Users: invitations, roles, warehouses and access
Who signs in to your account and what they can do: invite people, change their role, limit the warehouses each one sees, suspend or delete them, and the company's access policies.
On this page
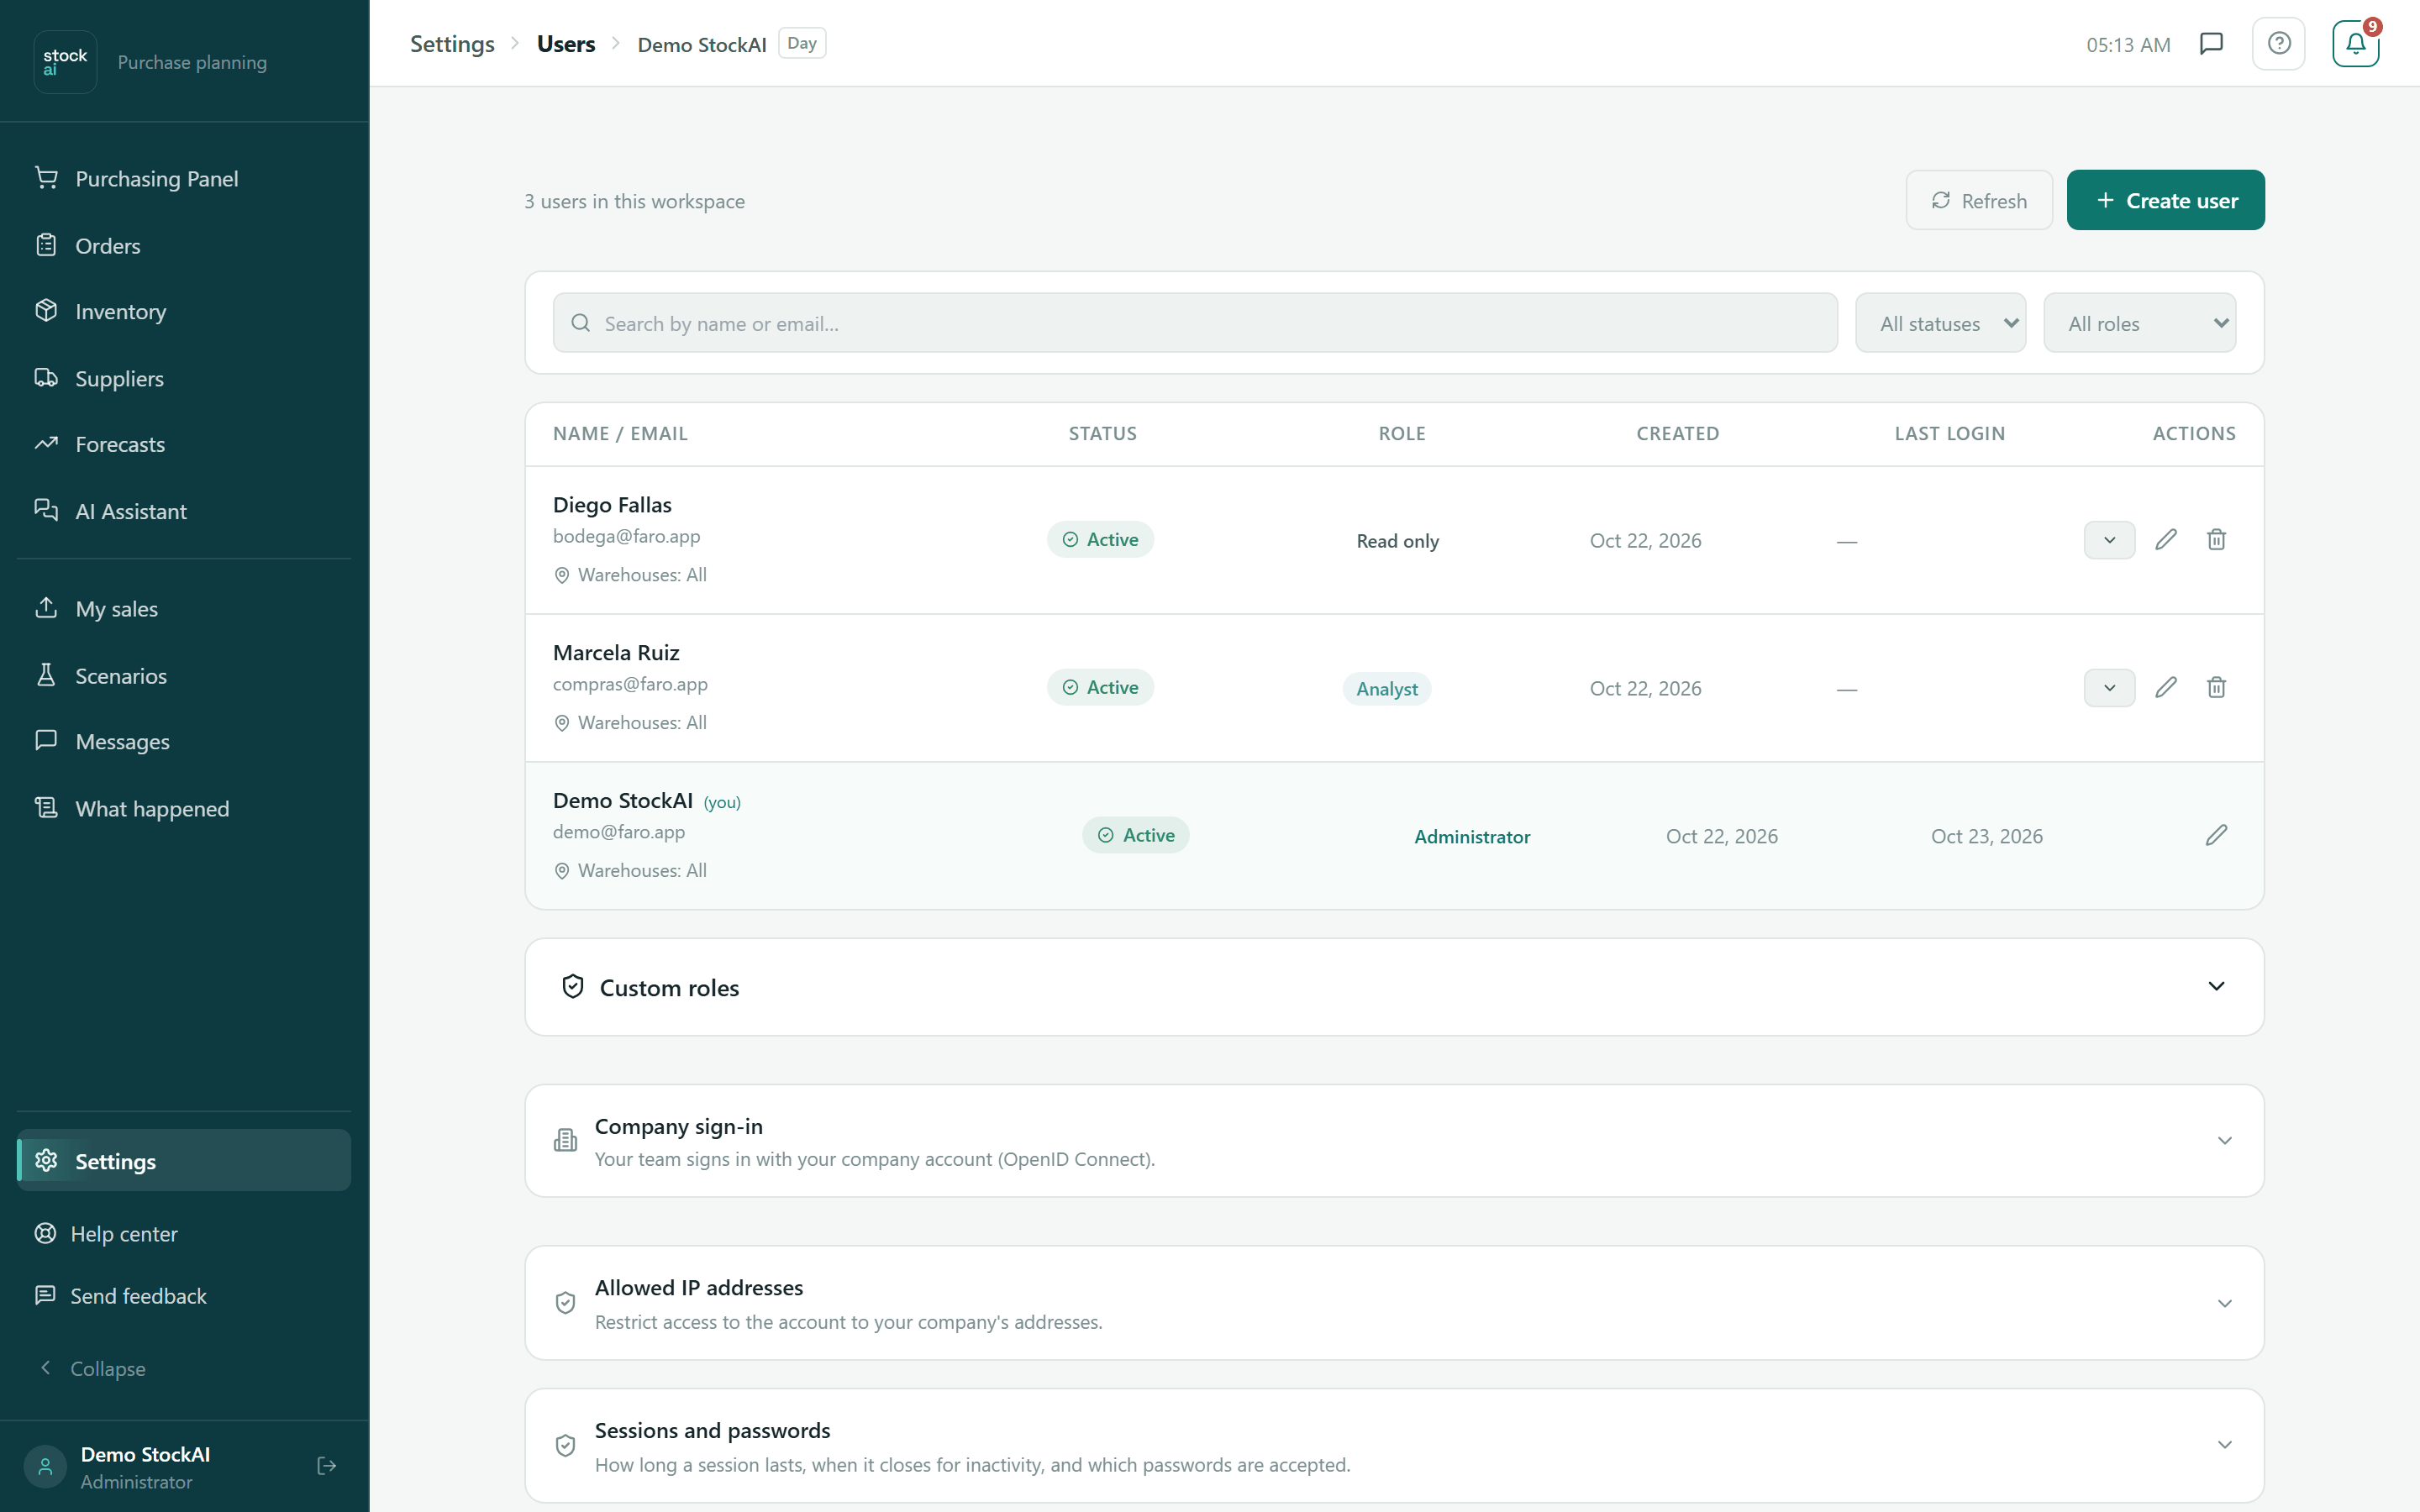
Open Users from Settings → Team → Users. It is an administrators-only screen: an analyst or read-only user who opens the address sees "You don't have permission to view this page."
The three roles
- Administrator
- Everything, including inviting people, changing roles, Automation, the plan and company settings.
- Analyst
- Works with the data: uploads sales, trains, approves and generates orders, schedules reports. Does not manage people or the account.
- Read only
- Sees screens and reports; changes nothing.
| Can… | Administrator | Analyst | Read only |
|---|---|---|---|
| See every screen, forecast, stock signal and order | Yes | Yes | Yes |
| Use the assistant and message the team | Yes | Yes | Yes |
| Upload sales, train, and edit inventory, suppliers and signal rules | Yes | Yes | No |
| Create, send, receive, mark paid and cancel purchase orders | Yes | Yes | No |
| Save scenarios, schedule recalculations and create API keys | Yes | Yes | No |
| Create, edit, suspend and delete users | Yes | No | No |
| Change the currency, the time zone and how often purchases are calculated | Yes | No | No |
| Configure the company's channels under Installation | Yes | No | No |
Authorization is by role only. If someone must be able to do less than their role allows, use a custom role (below).
The list
- Counter
- "3 users in this workspace".
- Refresh
- Reads the list again.
- Search by name or email…
- Filters as you type.
- All statuses
- Active, Pending (invited, email not confirmed yet), Inactive or Suspended.
- All roles
- Administrator, Analyst or Read only.
- Name / Email
- Under the email you may see Warehouses (if the company has two or more) and the custom role.
- Created / Last login
- When the account was created and when it last signed in ("—" if never).
- Actions
- Change status (arrow), Resend verification email (envelope, Pending only), Edit (pencil) and Delete (bin). Your own row only has Edit.
With more than 20 people, paging appears at the foot. If you are the only person in the account, instead of a one-row table you will see "Invite whoever buys with you" with the button to create a user.
Invite someone
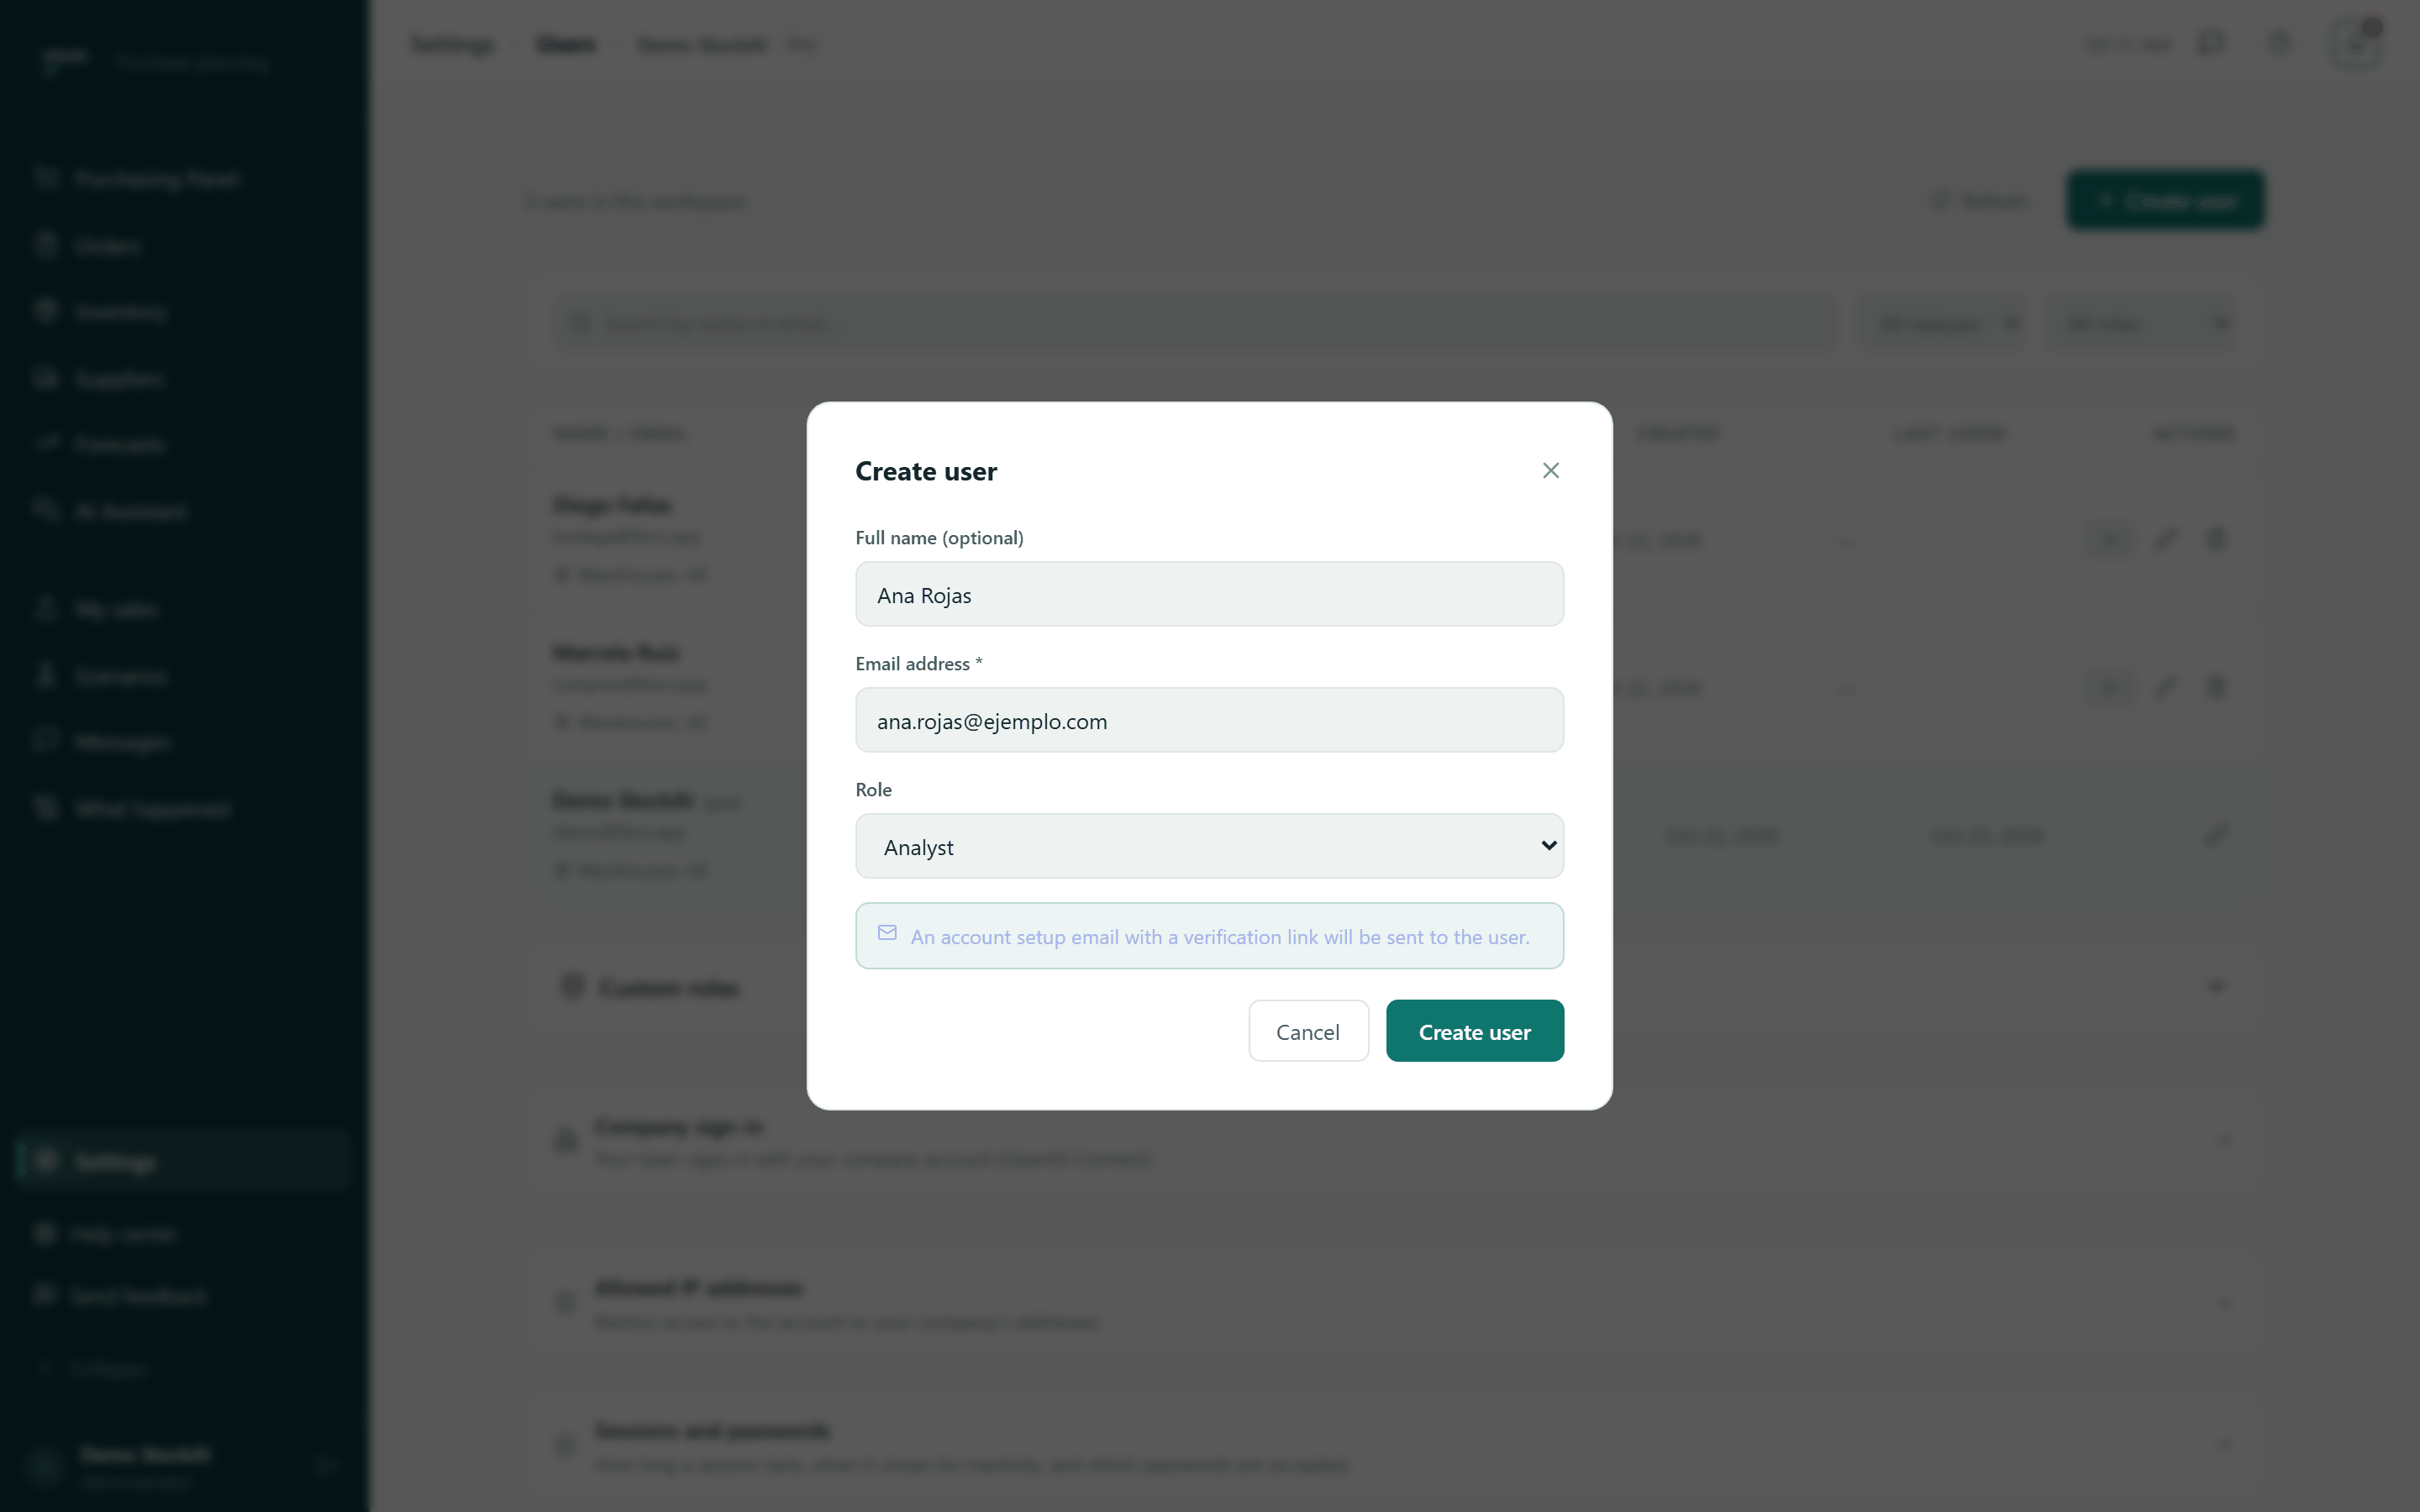
- Press "Create user".
- Type the Full name (optional) and the Email address (required).
- Choose the Role. The default is Analyst.
- Press "Create user" in the dialog. The person appears as Pending and receives an account setup email with a verification link.
If the email did not arrive, press the envelope on their row (Resend verification email). Your plan's user ceiling is in My account → Usage and limits; once reached, creating another opens the dialog to write to us.
Change the name, email or role
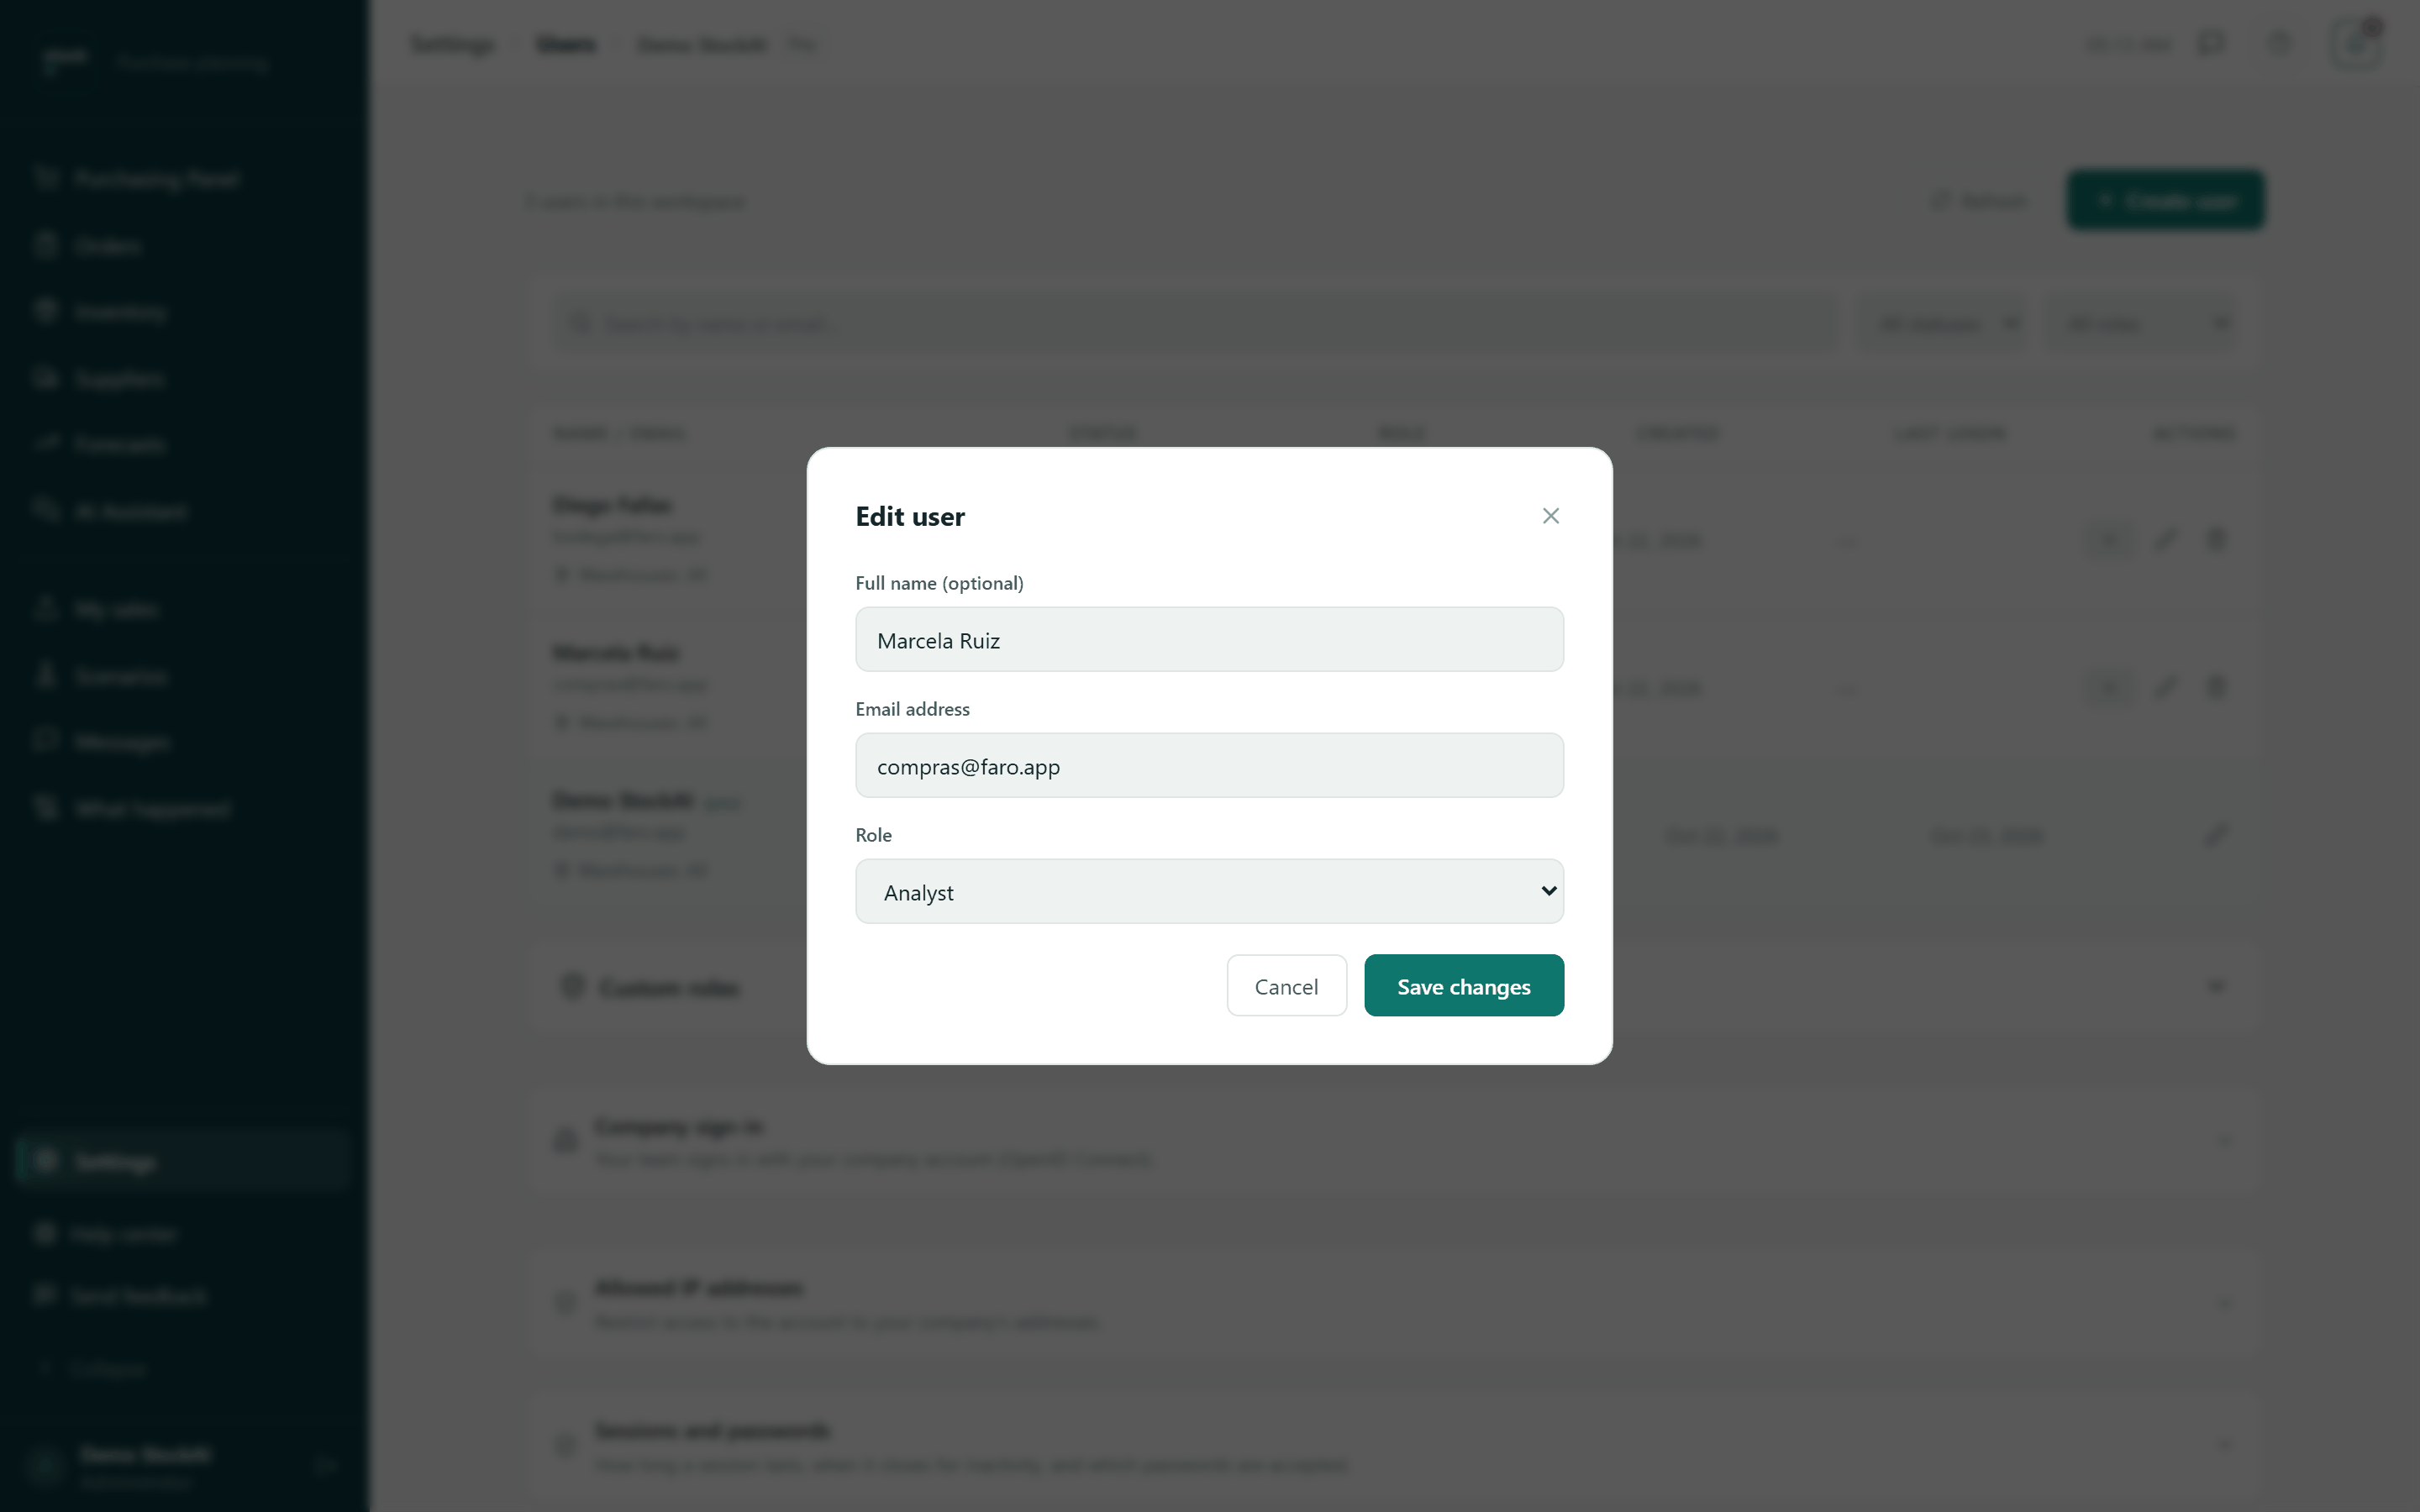
- Press the pencil (Edit) on the row.
- Change the name, email or role.
- Press "Save changes".
Deactivate or suspend
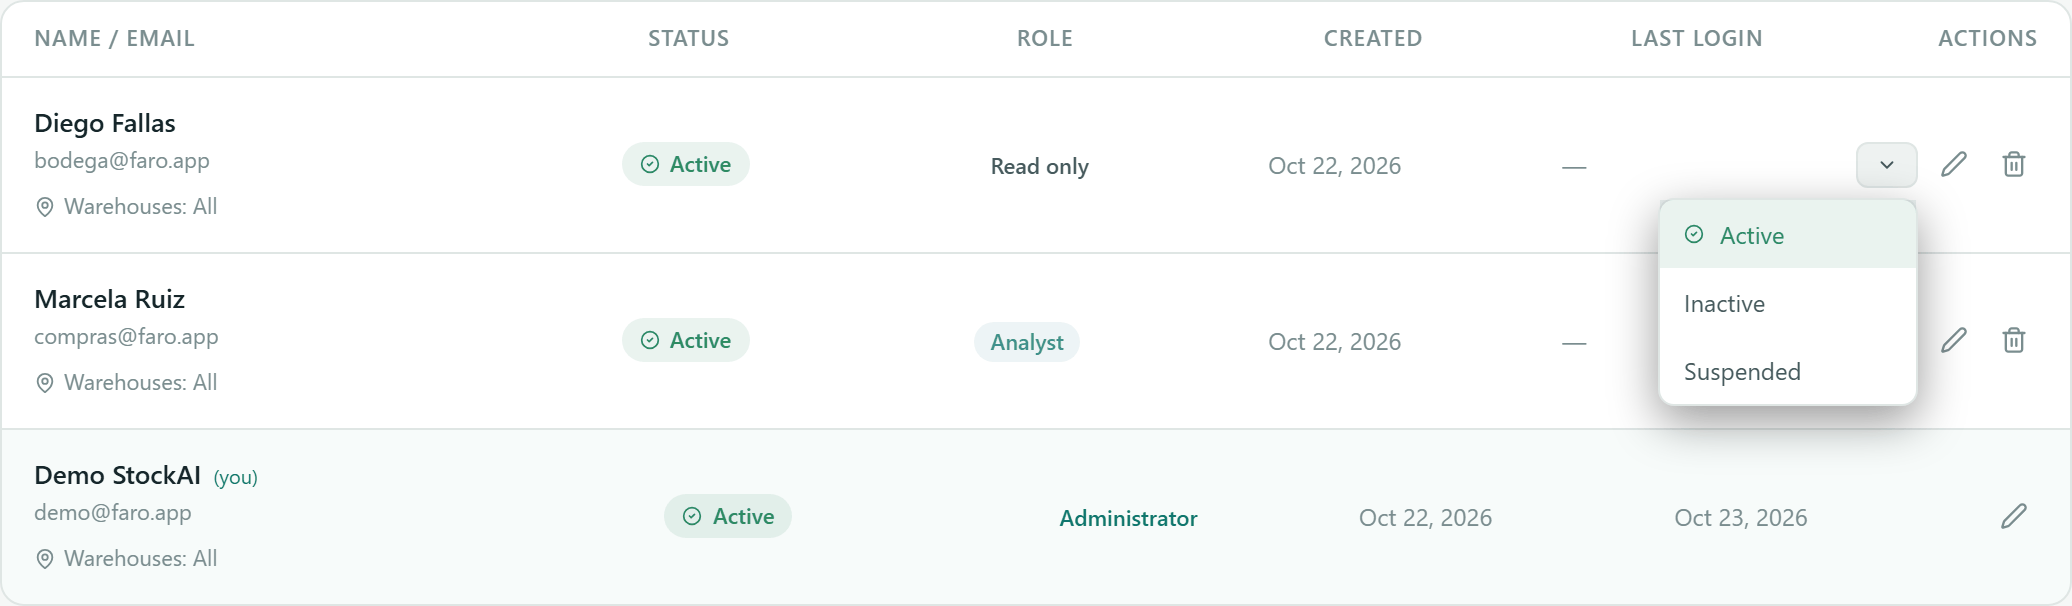
The row's arrow (Change status) opens a menu with Active, Inactive and Suspended; the current status is ticked. An inactive or suspended person cannot sign in, but their history (approved orders, changes) is kept, and you can set them back to Active any time. You cannot change your own status.
Limit a person's warehouses
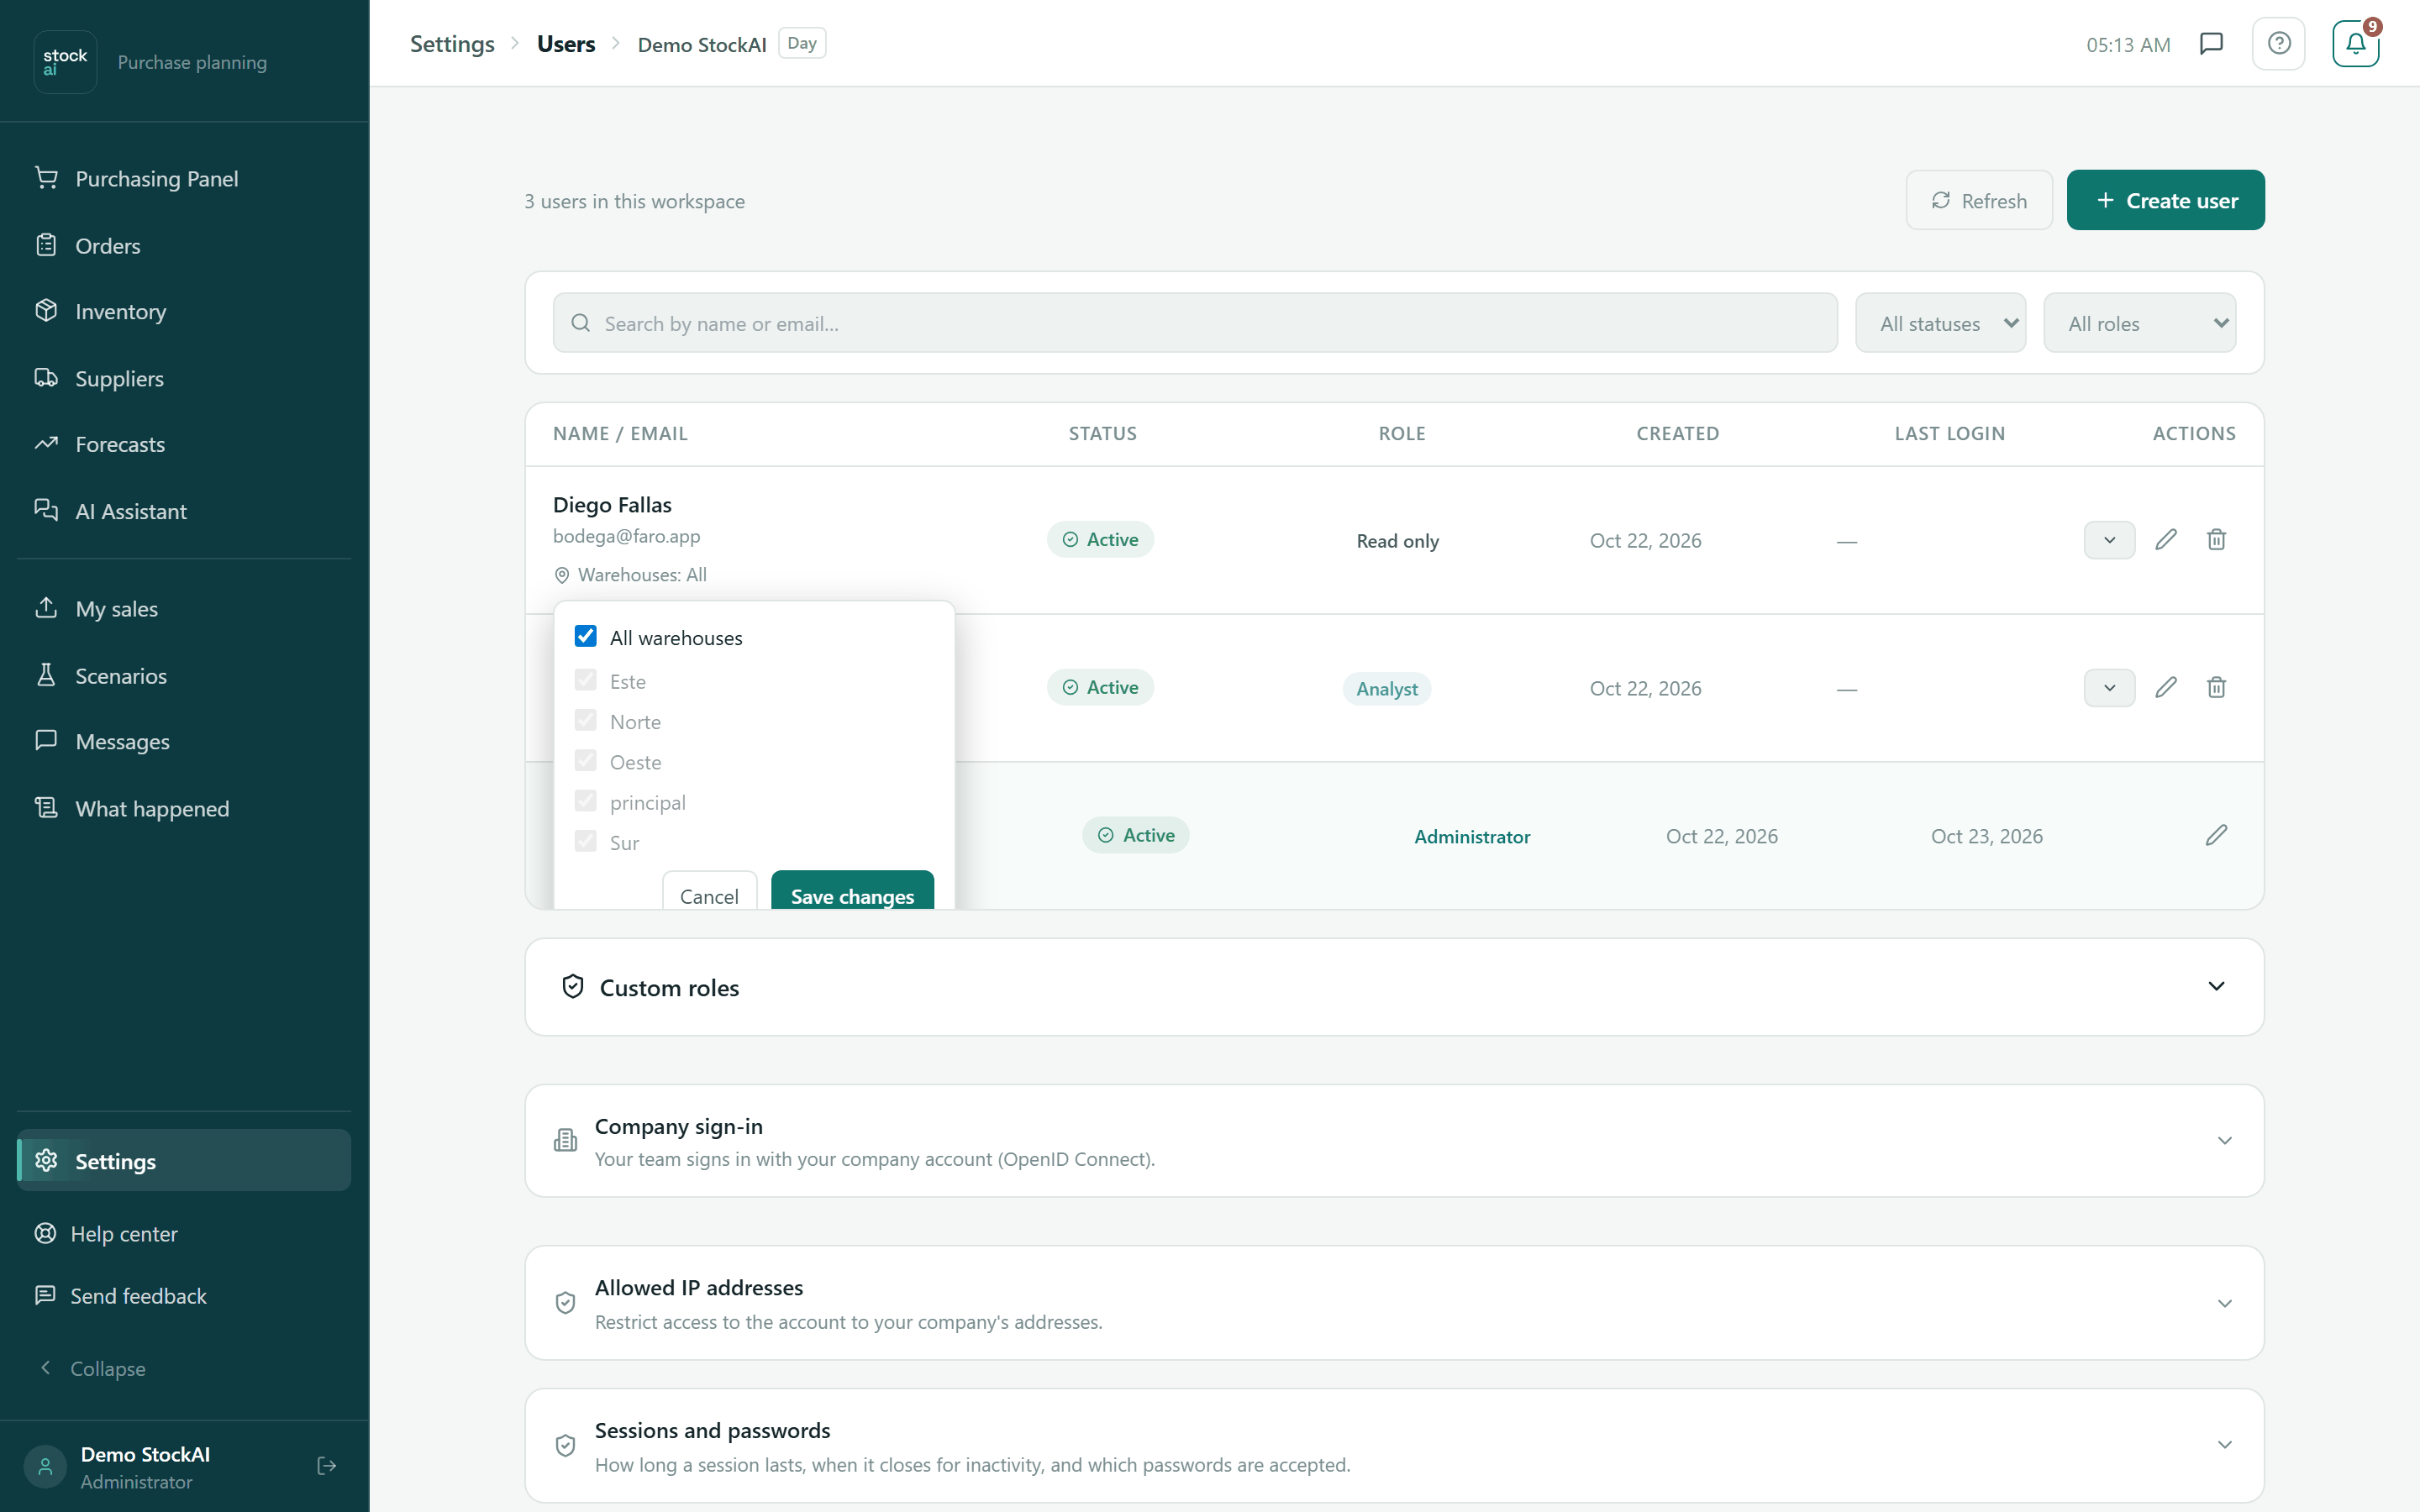
If your company has two or more warehouses, each row shows Warehouses: All (or others). That control decides which warehouses the person can see and change.
- Press "Warehouses: …" under the person's email.
- Untick "All warehouses" and tick only the ones they should see.
- Press "Save changes" (or "Cancel" to leave everything as it was).
Delete someone
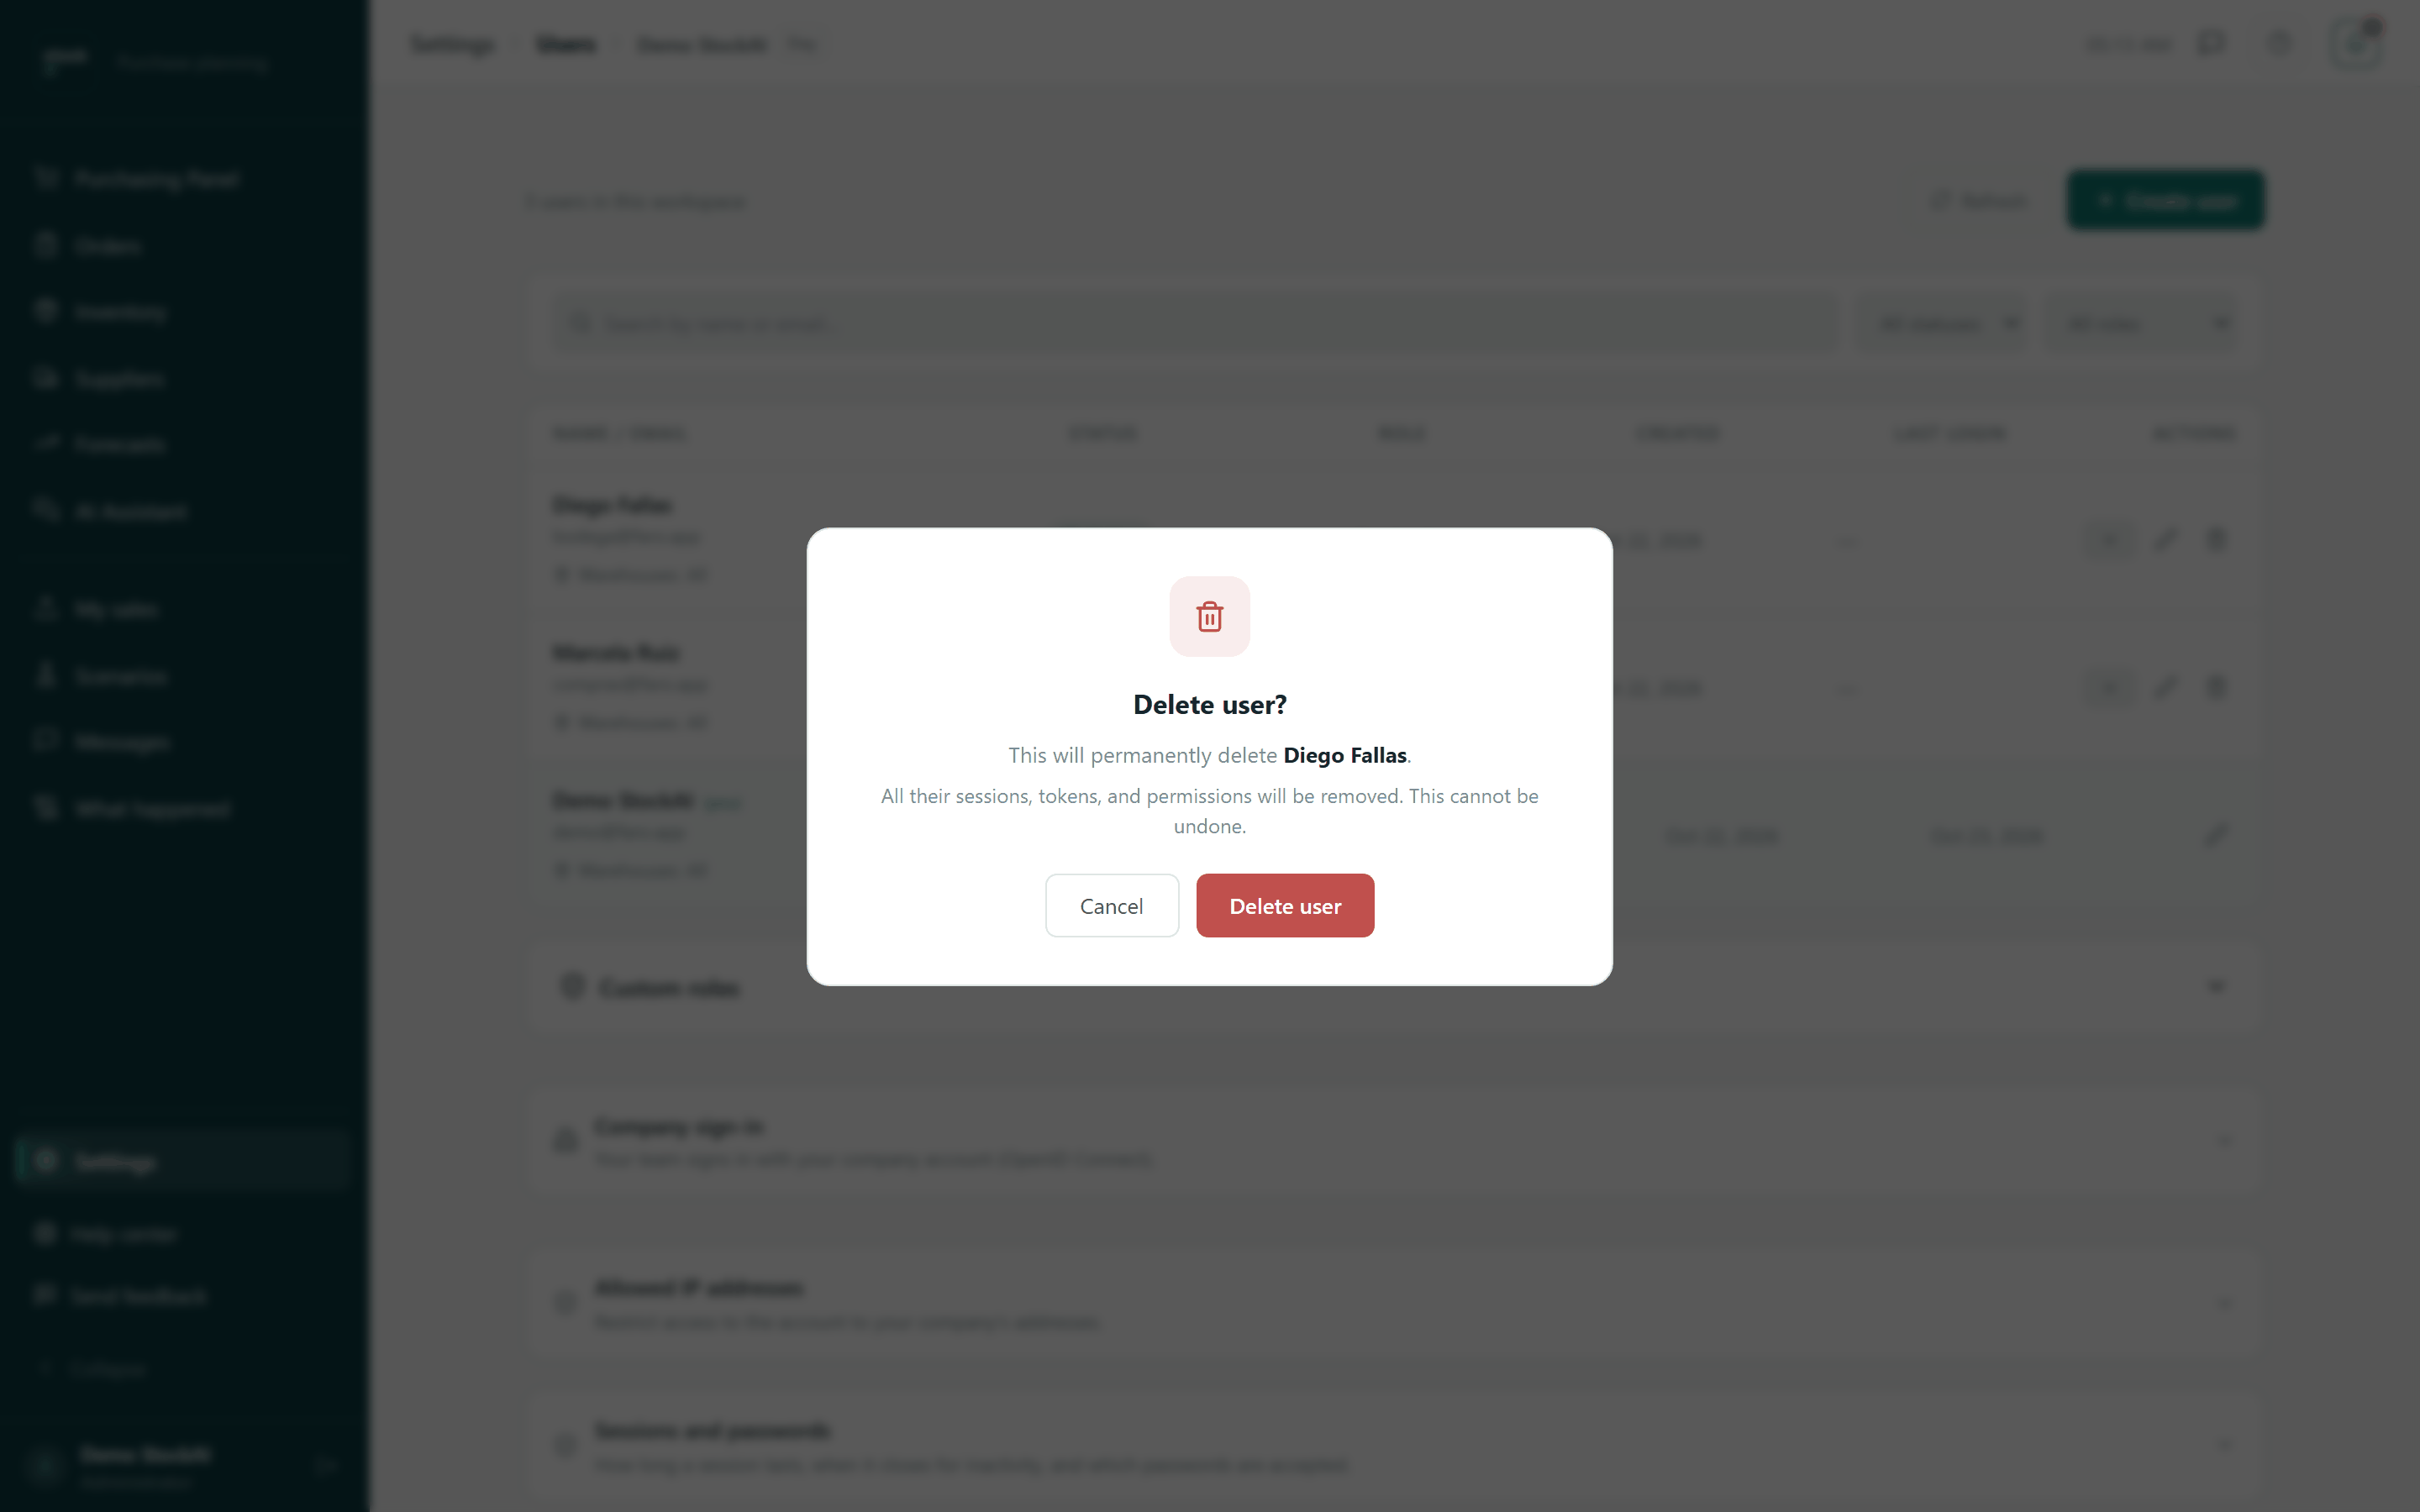
The bin opens "Delete user?". Confirming with "Delete user" removes their sessions, tokens and permissions. It cannot be undone. If you only want to cut their access, set them Inactive: that is reversible. You cannot delete yourself.
User limit
An account can have a ceiling on users. Trying to create one more than the ceiling opens the "You reached your plan limit" dialog with the ways to reach us. See Usage limits.
Company access
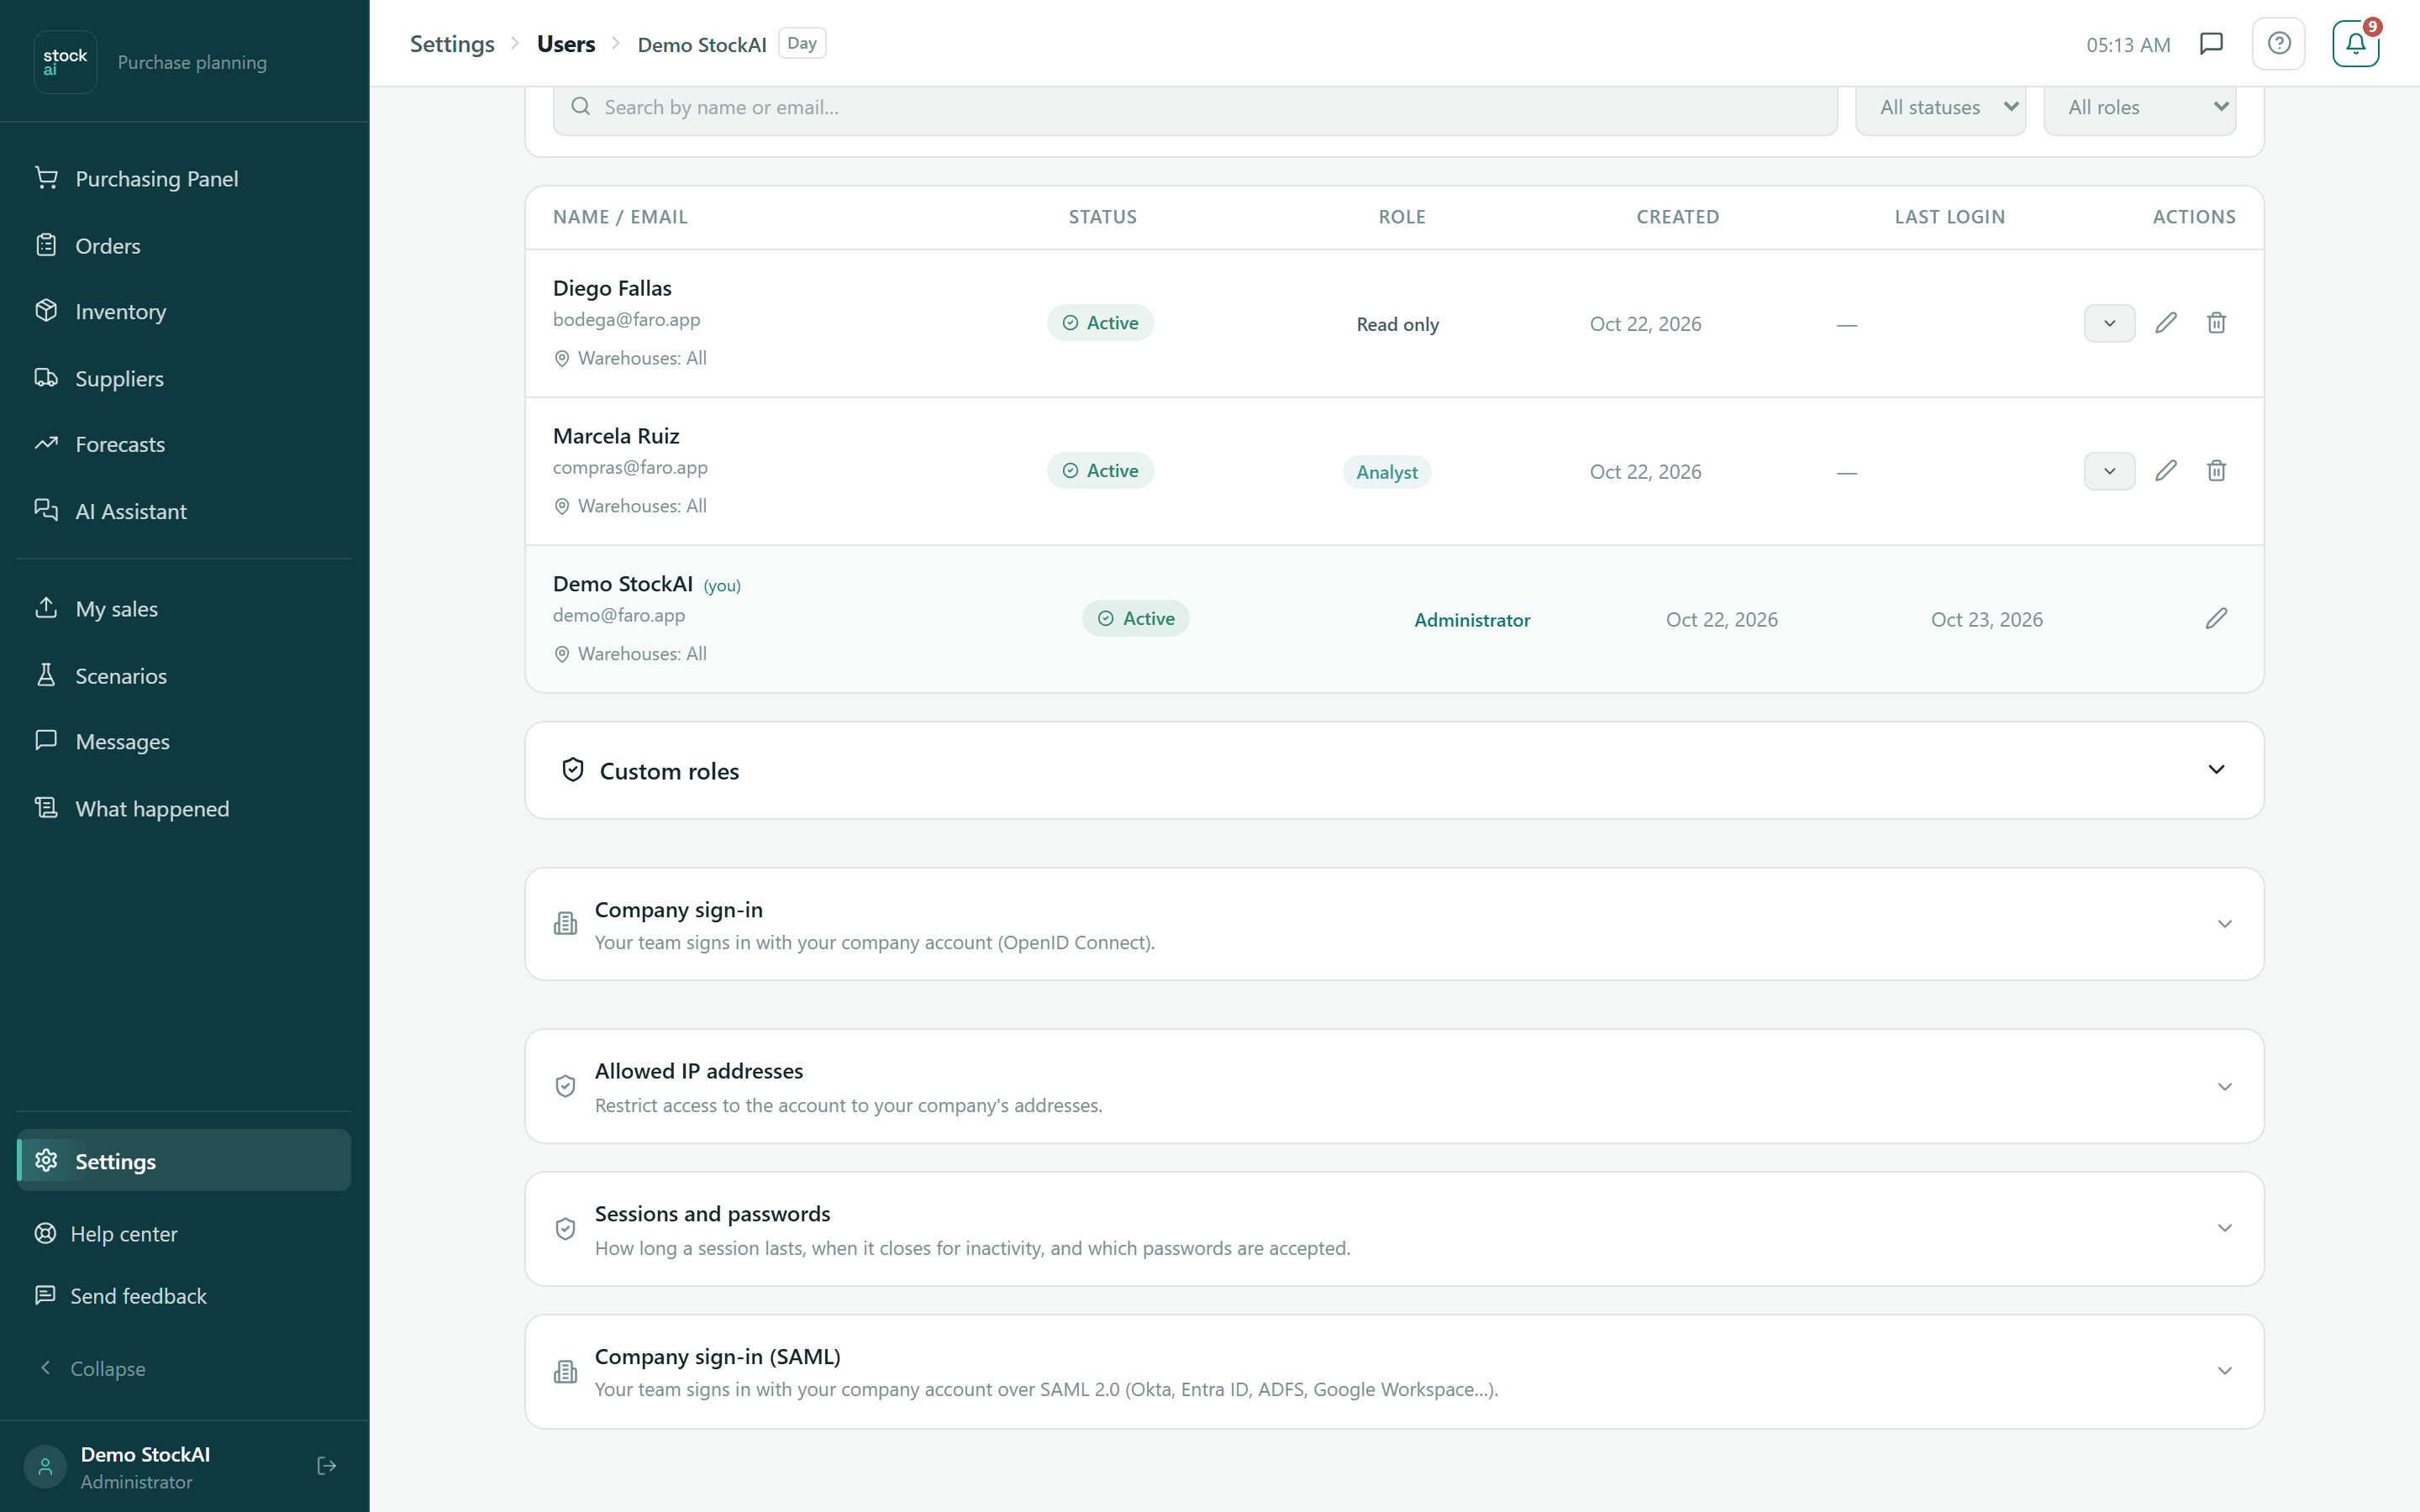
At the foot of the screen are five folded cards; press one to open it.
- Custom roles
- A custom role is a named set of permissions that narrows what a person can do within their role; it never grants more. With "New role" you type a name and description and tick the permissions. Then, on each person's row, you choose their custom role. The server enforces it on every click.
- Company sign-in
- Your team signs in with your company account (OpenID Connect): issuer, client ID and secret, the company's email domains, the role for new people, an optional group-to-role table and "make it mandatory". The secret is never shown again. SCIM provisioning (people added and removed automatically from your identity provider) lives inside it too.
- Allowed IP addresses
- Restricts the account to your company's addresses. The card shows the address the server sees for you and whether the entries cover it; the server refuses a change that would lock you out.
- Sessions and passwords
- How long a session lasts, when it closes for inactivity, how many sessions at once, minimum password length and age, upper-case and symbols, and lockout after failed attempts. Empty or off means "no limit". Below, the accounts locked right now, each with an unlock button.
- Company sign-in (SAML)
- The same over SAML 2.0 (Okta, Entra ID, ADFS, Google Workspace…): first what your provider needs from StockAI (entity ID, ACS URL and downloadable metadata), then the provider's details. An account uses OpenID Connect or SAML, not both.