Stock count
Count your warehouse with your phone or a barcode reader, compare what you counted with what the system says, and apply only the differences, with a record of who and when.
On this page
The Stock count opens from the … menu in Inventory (“Stock count”). It is not in the sidebar. It works on a phone (the camera reads barcodes), with a USB or Bluetooth reader, or by typing the code.
Starting a count
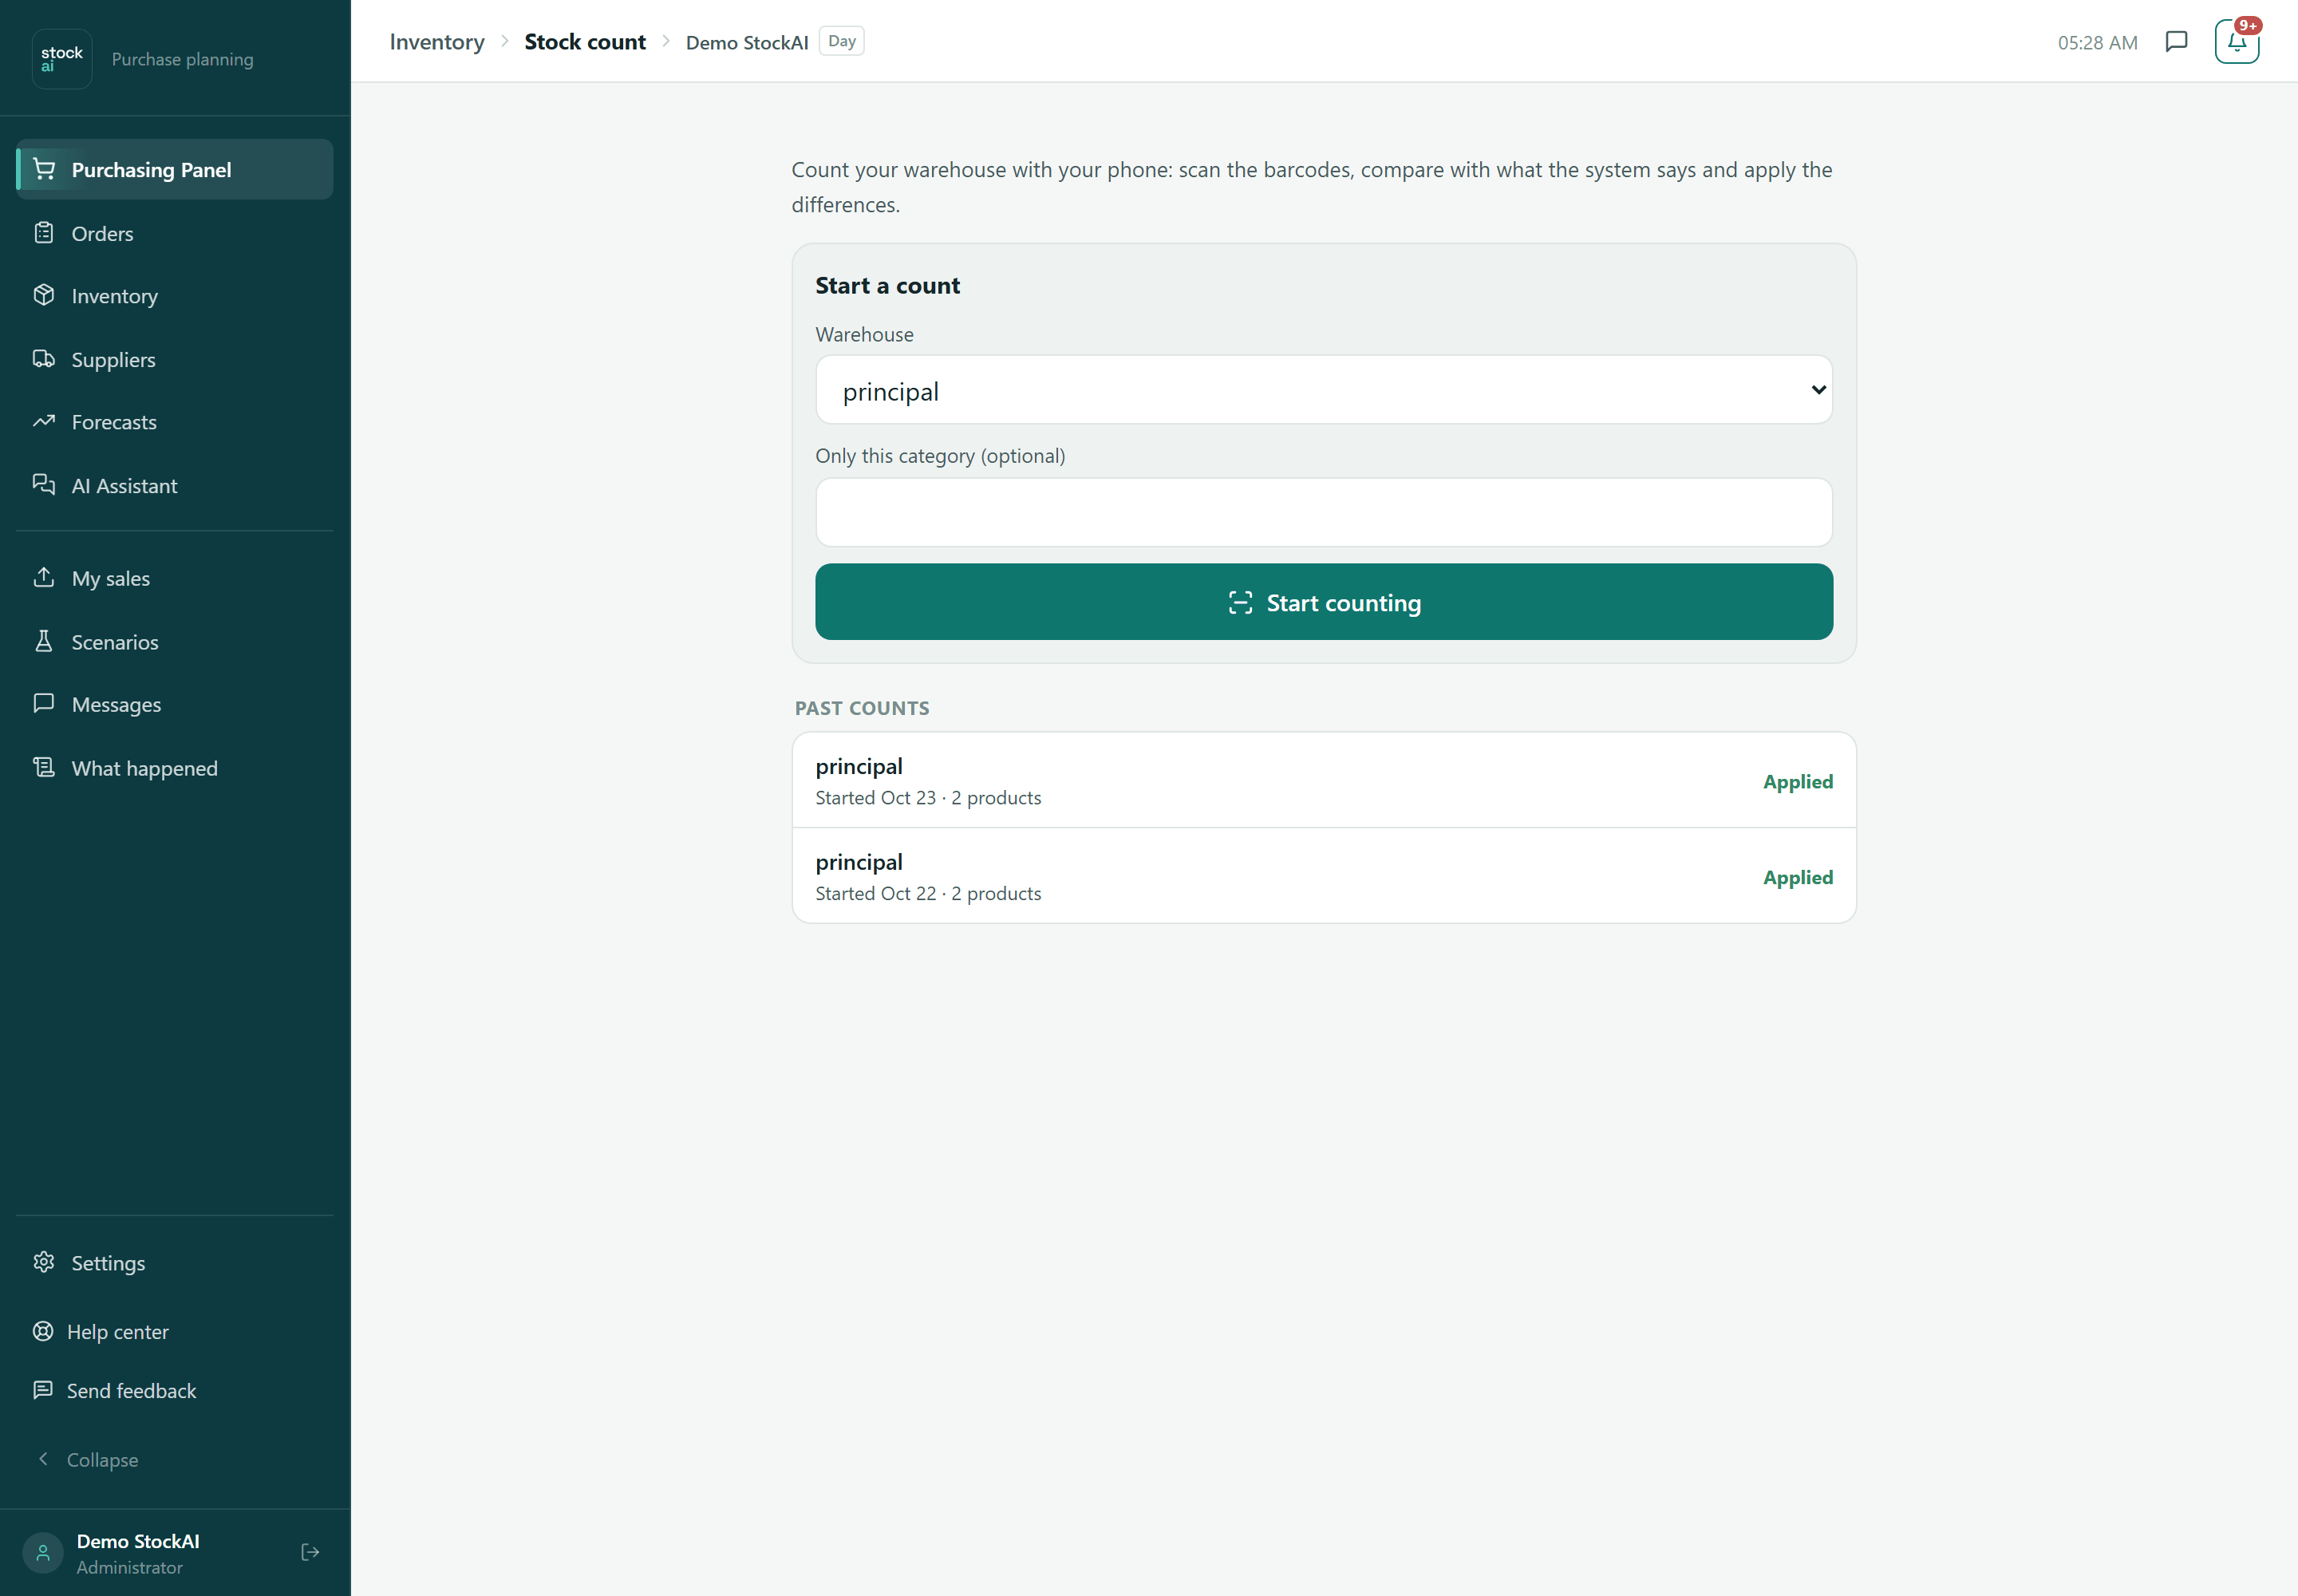
- With several warehouses, choose the Warehouse you will count (the main one by default). With a single warehouse the field is not shown.
- Optional: in “Only this category (optional)” type a category to count only that part of the catalogue.
- Press “Start counting”. The counting screen opens.
Below are “Counts in progress” (In progress and To review) and “Past counts” (Applied and Cancelled), each with its warehouse, category, start date and how many products it holds. A click opens the count.
Counting
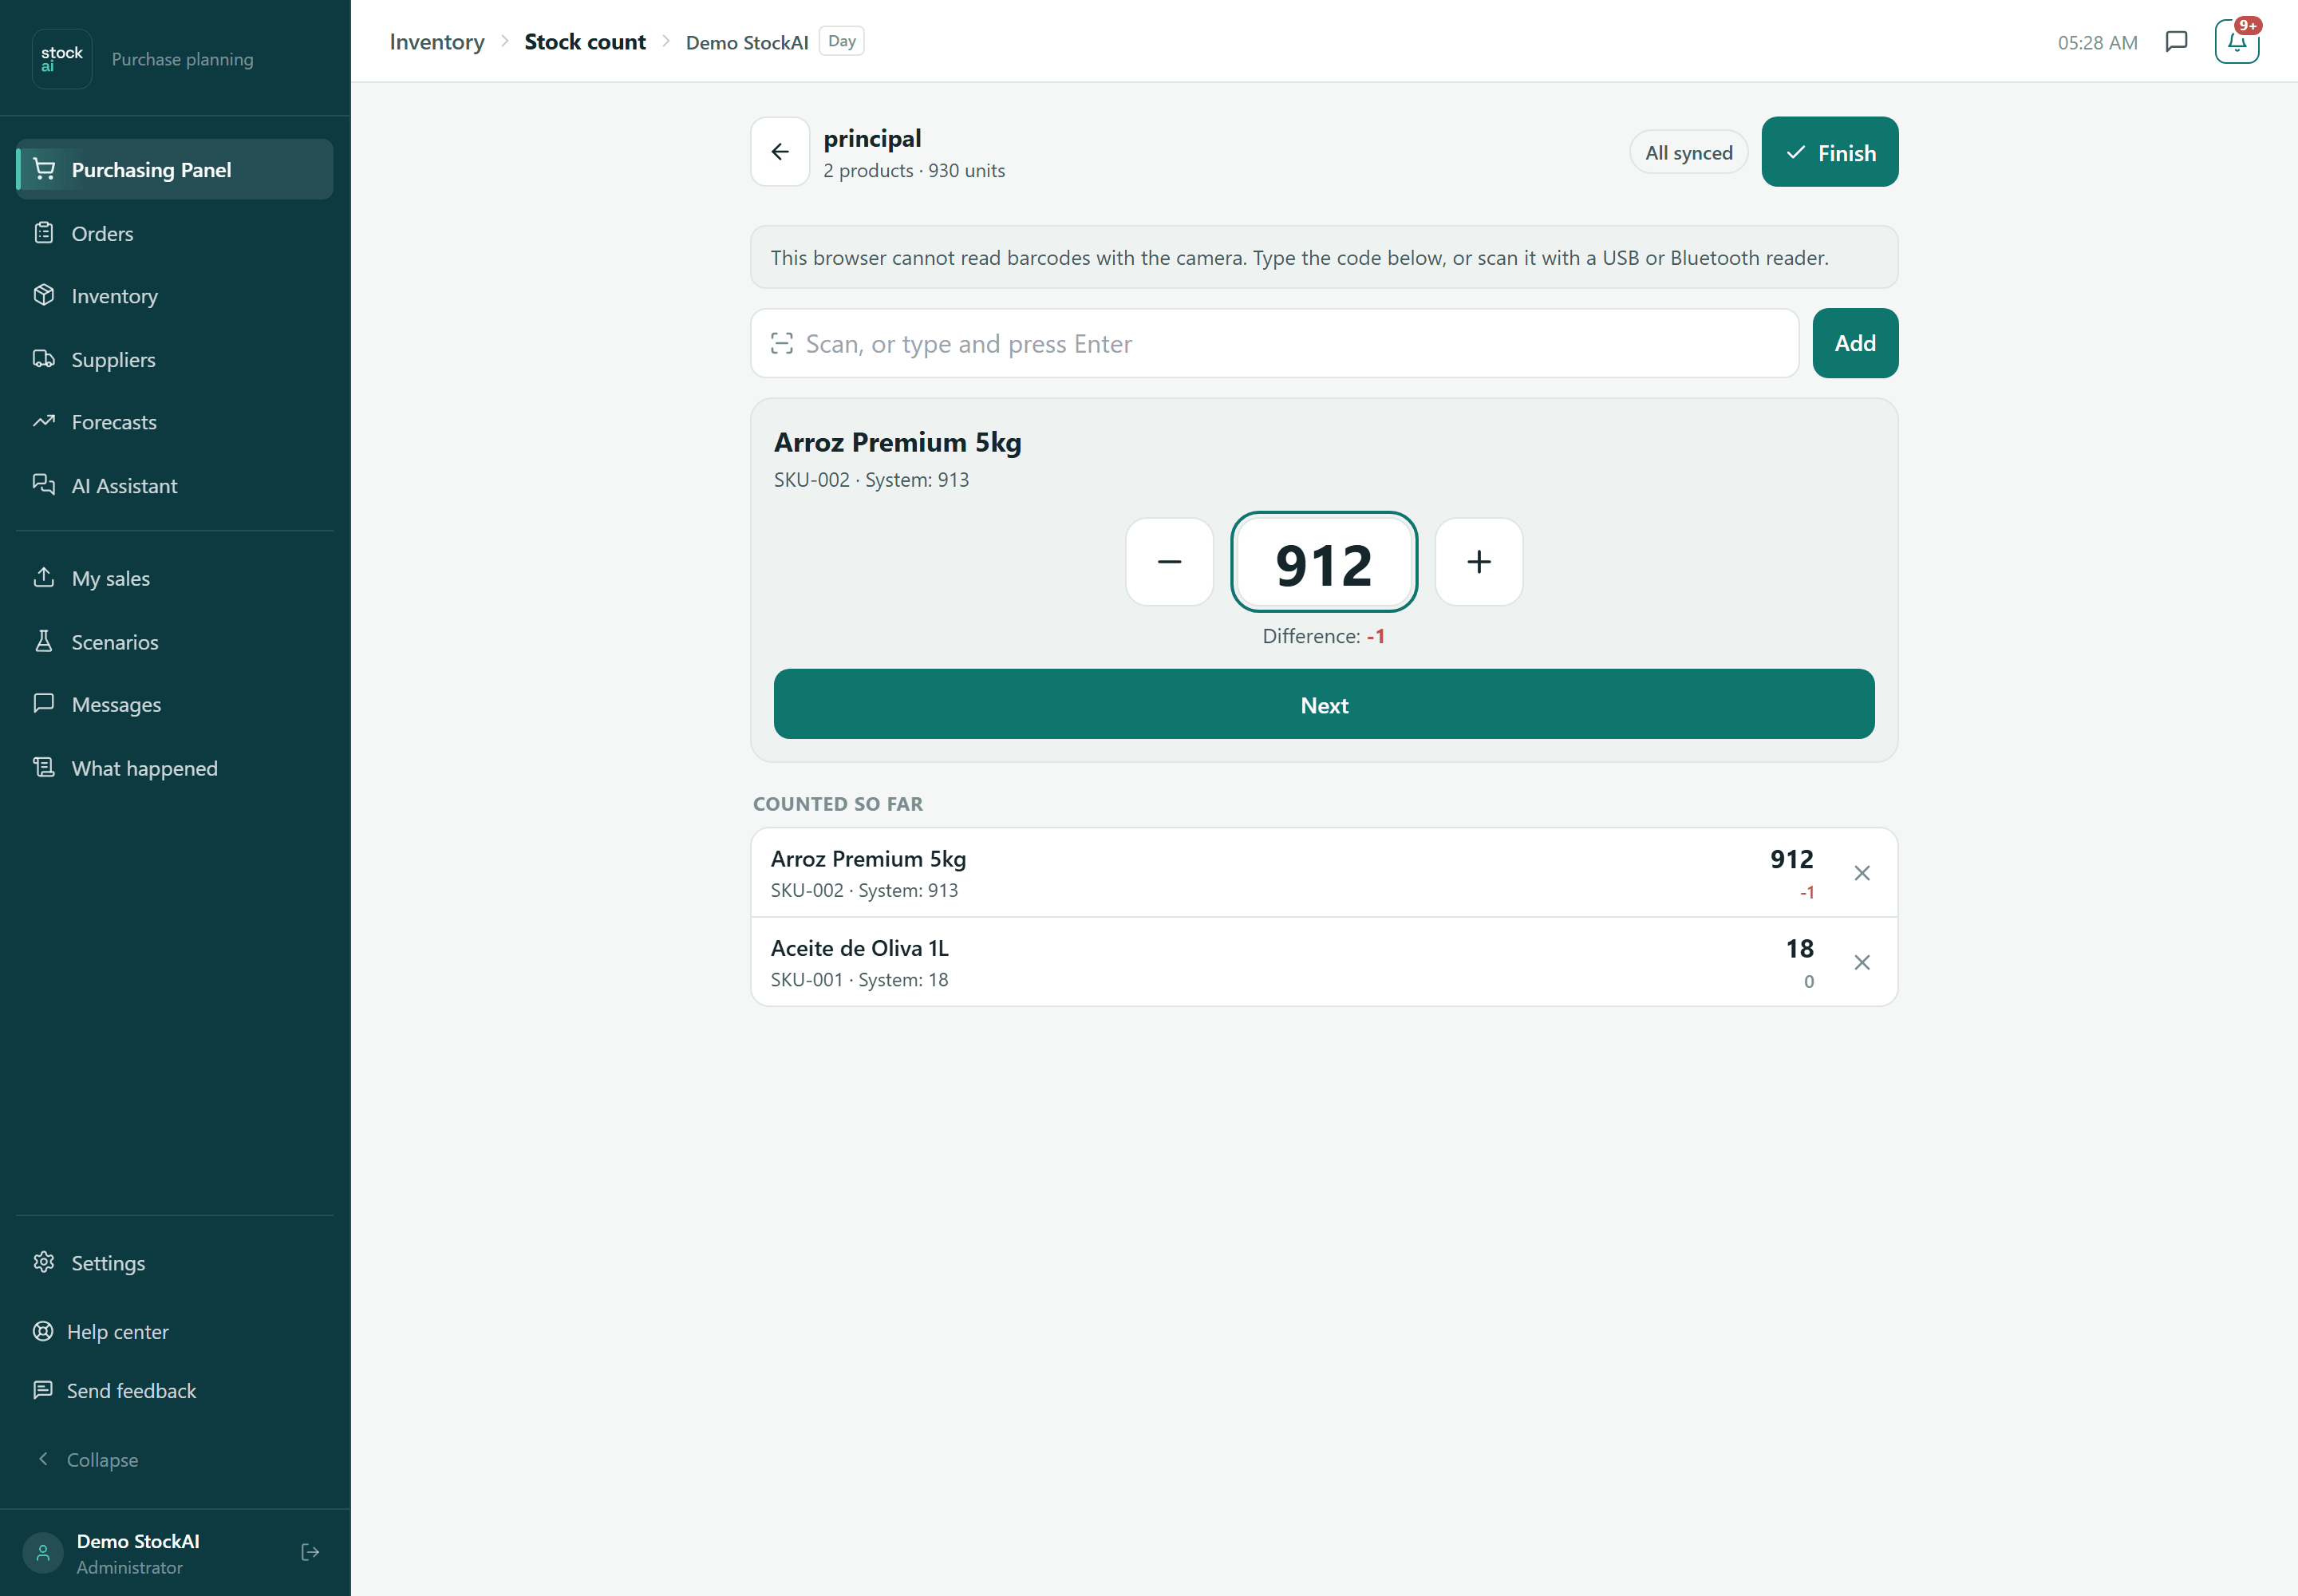
- ← (Leave the count)
- Back to the list. The count stays open and you can carry on later.
- Warehouse and counter
- The warehouse you are counting and “N products · M units”.
- Sync status
- “All synced”, “Syncing…” or “N pending sync”. Every scan is stored on the device first and sent when there is a connection.
- Finish
- Closes the count for review. See Finishing and reviewing.
- Use the camera / Turn the camera off
- Opens the rear camera and reads codes by itself. The same code held in view does not add a unit per frame: it waits two seconds. If the browser cannot read barcodes or has no permission, the screen says so and asks you to type the code.
- Barcode or SKU
- “Scan, or type and press Enter”. A USB or Bluetooth reader types here too. From two letters on, products are suggested by code or name. Add sends the code.
- The product card
- Name, SKU, unit and System: N (what the system believed at the first scan). Every scan adds 1. The − and + buttons remove or add a unit, and you can type the Counted quantity directly. Difference shows green (surplus) or red (short). Next saves and returns to the code field.
- Counted so far
- Each product with what was counted, what the system says and the difference. A click reopens it; the X removes it from this count.
- Scan or type the first product's code and press Enter. Its card appears with 1 unit counted.
- Keep scanning the same product (each scan adds 1) or type the total and press Enter.
- Press Next and go on to the next product.
- When the aisle or the warehouse is done, press Finish.
- We could not find “…” in your inventory
- The code matches no SKU and no barcode.
- The code “…” matches several products
- Several products share that barcode: search by SKU instead.
- It has no recorded stock in …
- The product exists but never had stock in this warehouse; applying the count will create it.
- Scans the server did not accept
- Refused scans (for example, the count is no longer open). They are never dropped silently: review them and press Discard.
Finishing and reviewing
Finish asks “Finish the count?”: afterwards you cannot add products and you move on to reviewing the differences. You cannot finish with unsynced or unresolved refused scans. Stock does not change until you apply.
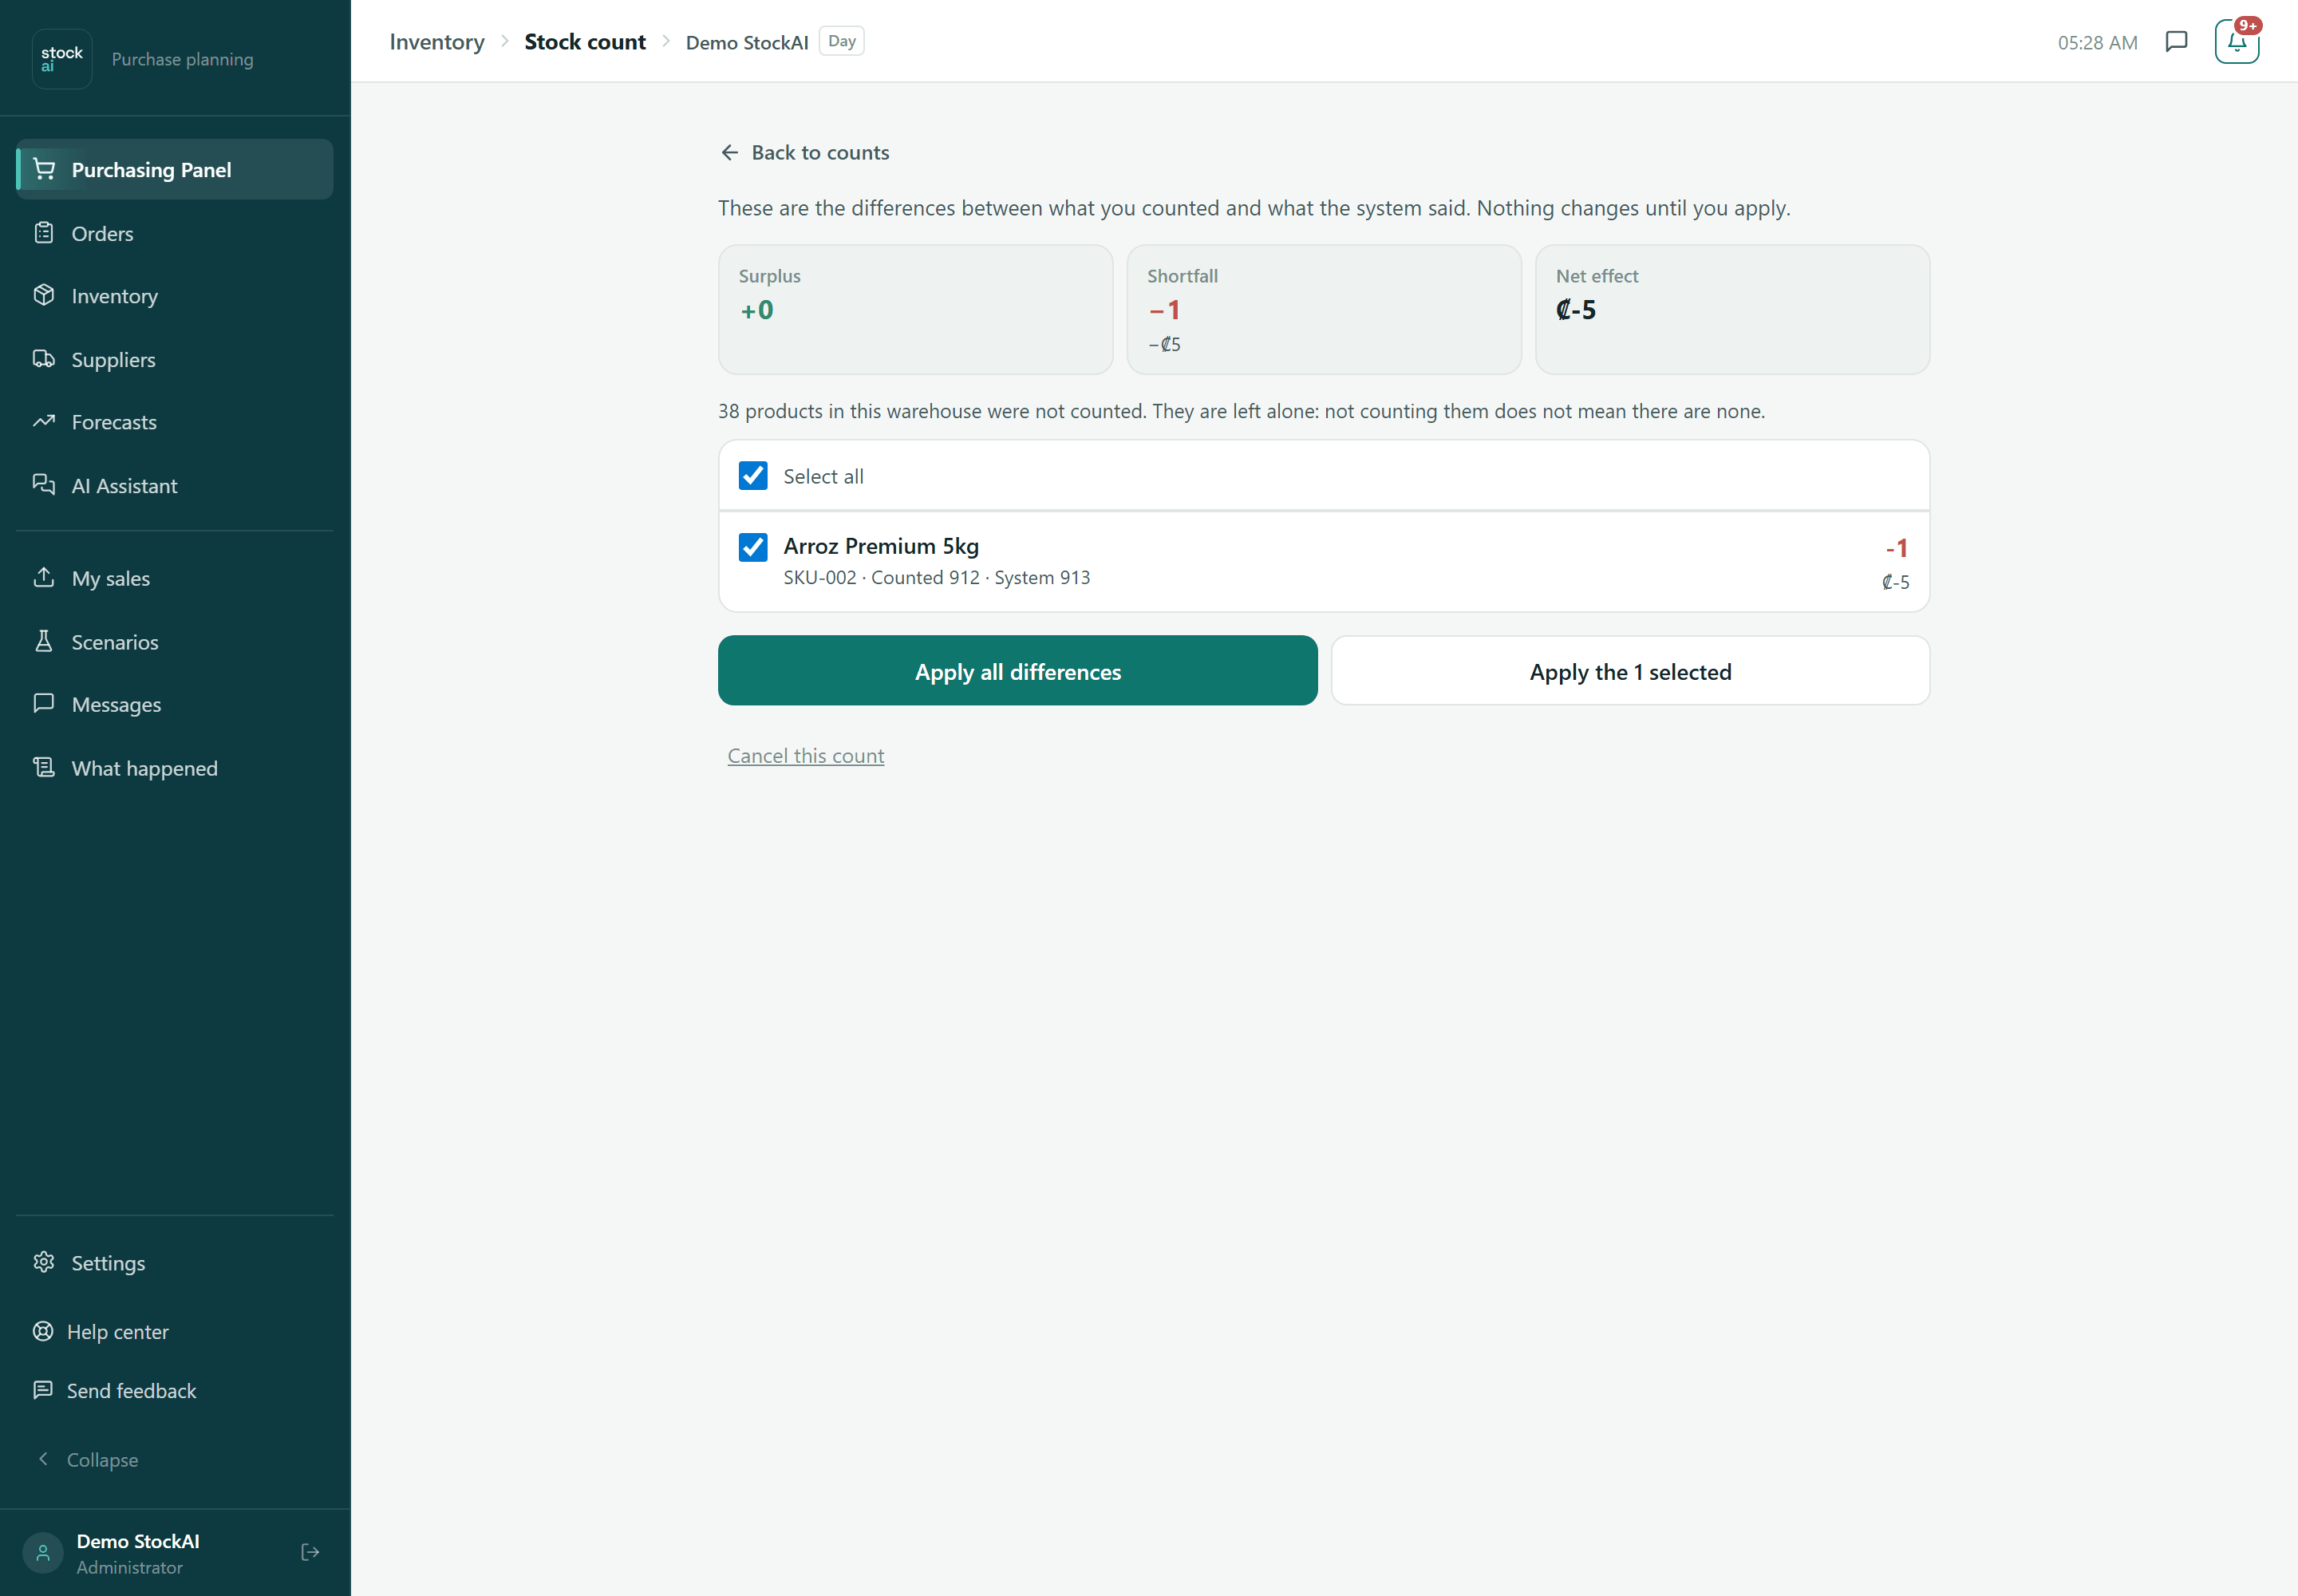
- Surplus / Shortfall / Net effect
- Units and money over, under and in total. Products with no cost are left out of the value, and the screen says how many.
- Products not counted
- “N products in this warehouse were not counted. They are left alone: not counting them does not mean there are none.”
- Each difference
- “Counted N · System M”, the difference and its value (or “No cost”). “Stock changed since you counted it” warns that goods came in or went out meanwhile: the difference will be applied, the number will not be overwritten.
- Select all / checkboxes
- Choose which differences to apply.
- Apply all differences / Apply the N selected
- Write the adjustment into that warehouse's stock.
- Cancel this count
- Stock does not change; the scans stay saved but can no longer be applied.
- Check each difference. If one looks wrong, untick it.
- Press “Apply all differences” or “Apply the N selected”.
- Confirm “Apply the count?” with Apply.
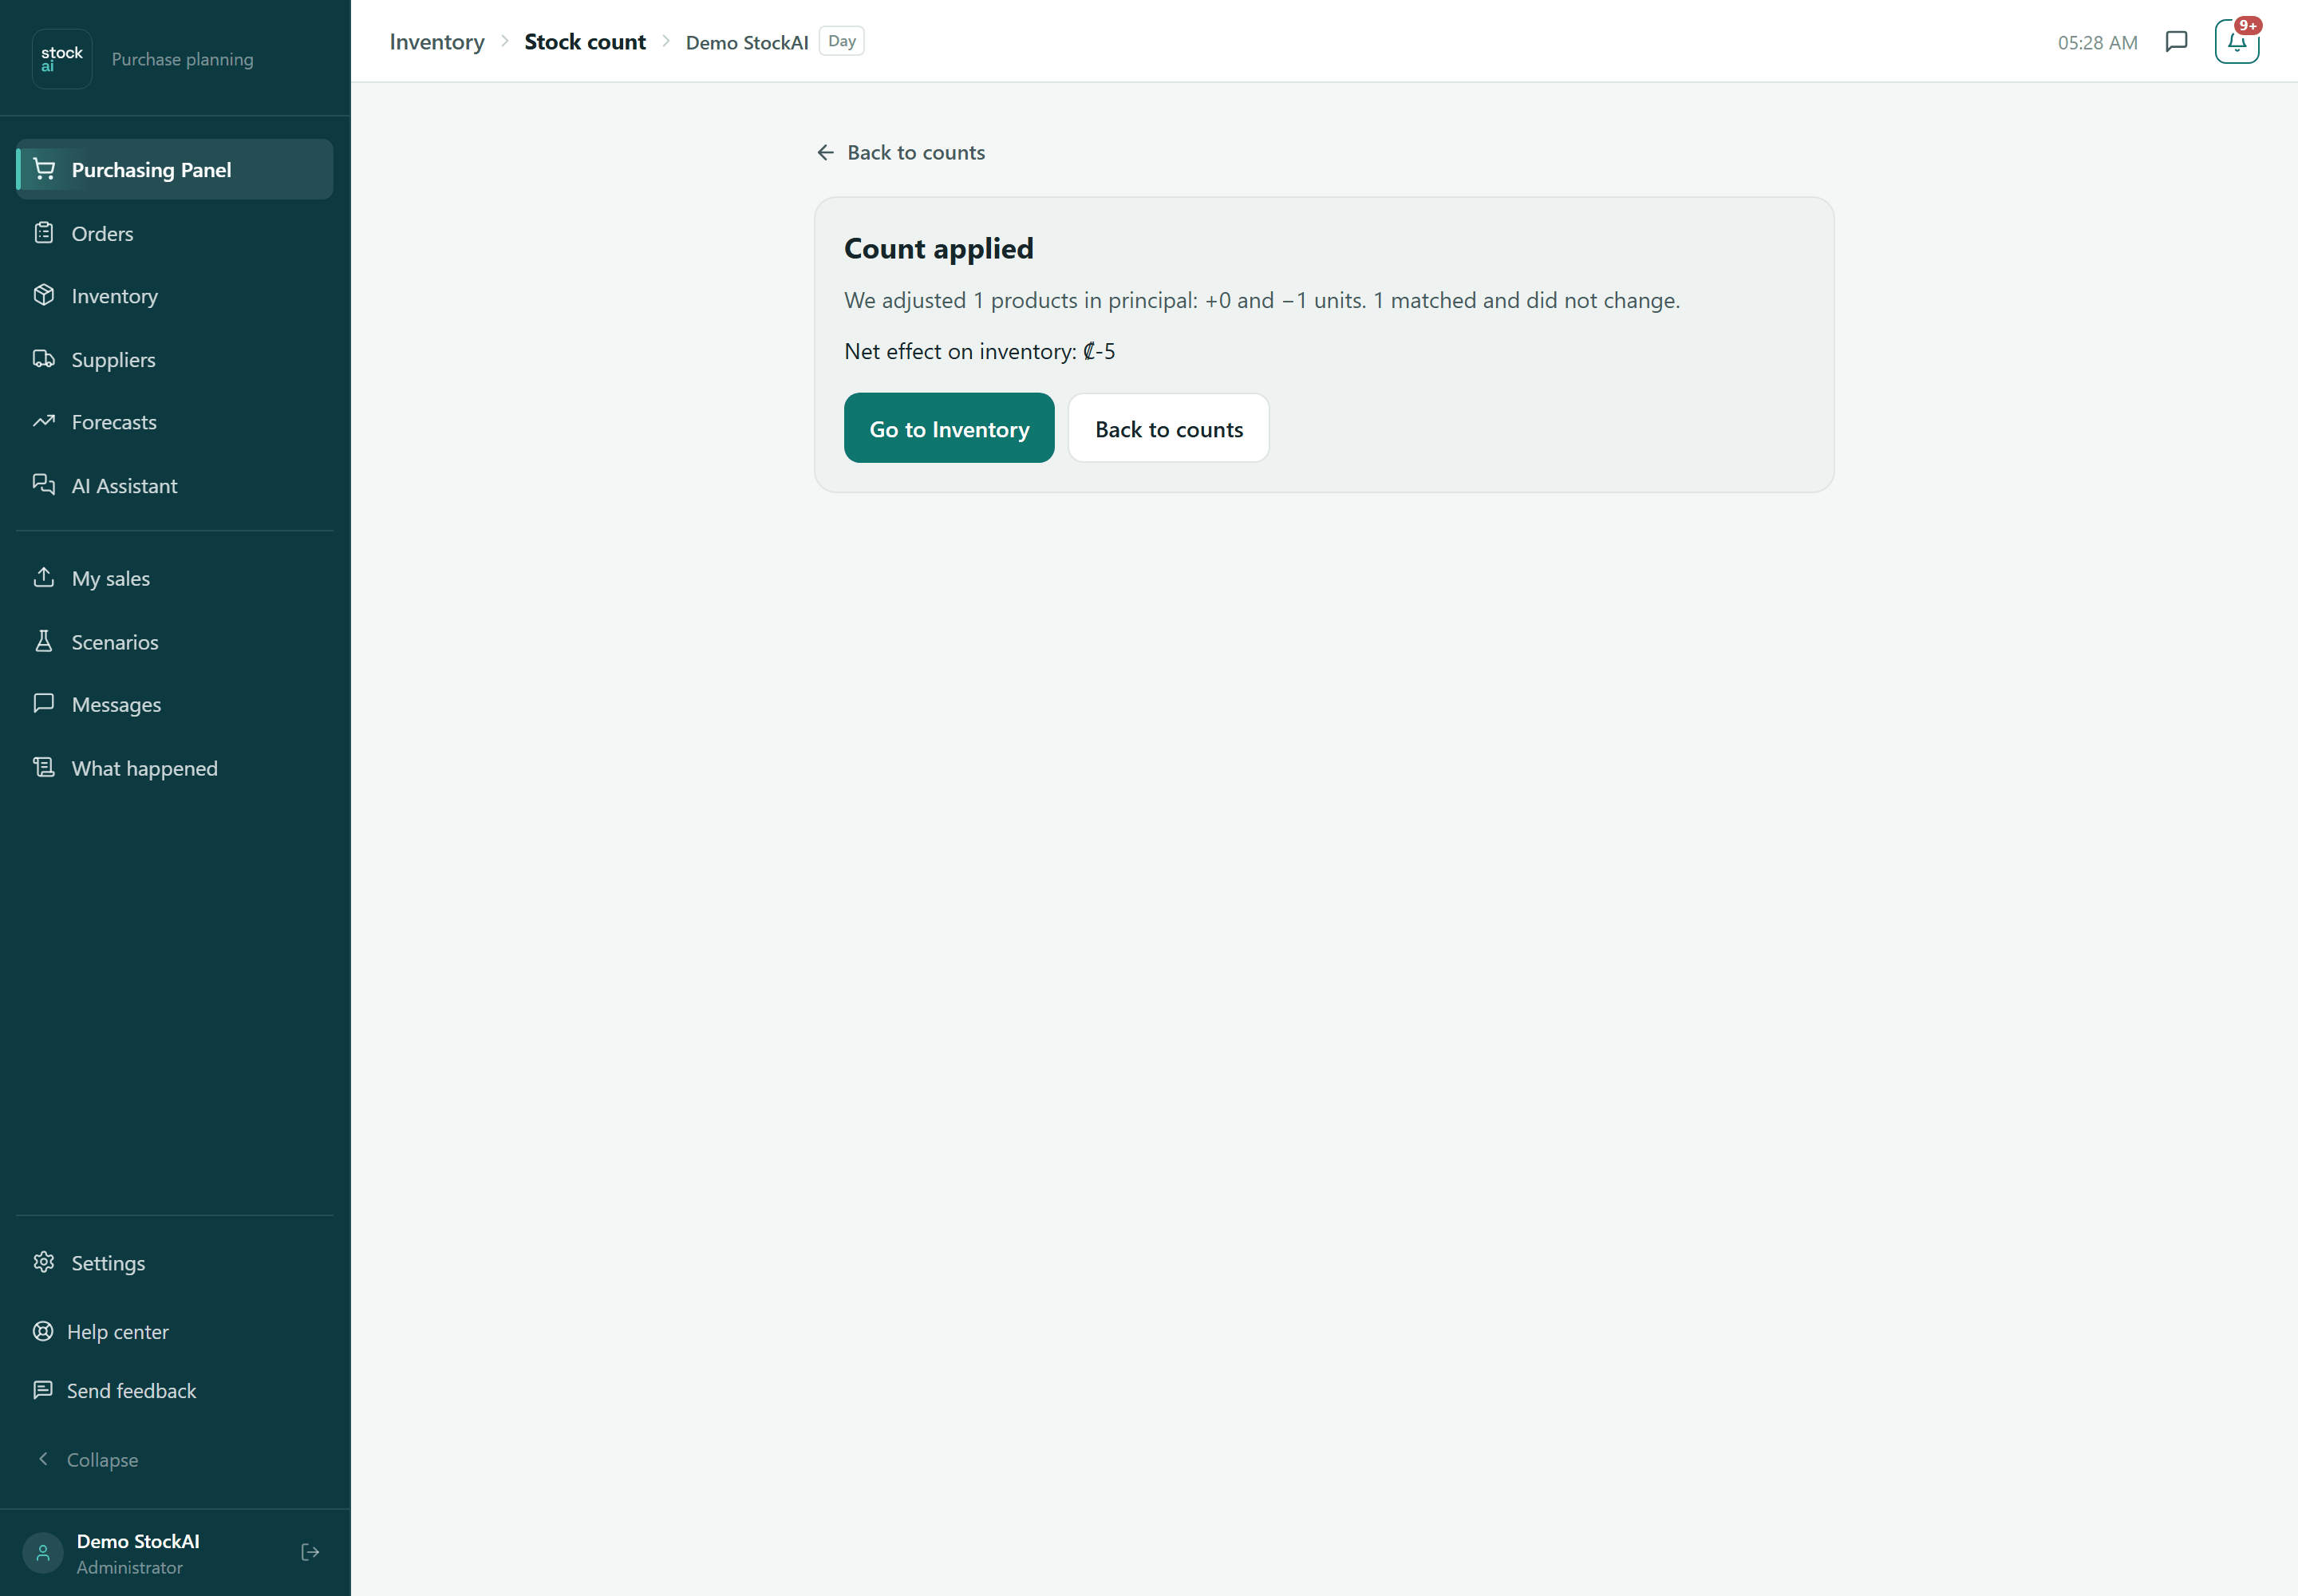
- You see “Count applied”: how many products were adjusted, units added and removed, and the net effect in money. “Go to Inventory” or “Back to counts”.